Omnisend Integration
Step 1: Set up your Omnisend API key with Buy Again & Reorder Reminder
Section titled “Step 1: Set up your Omnisend API key with Buy Again & Reorder Reminder”You can manage your Omnisend account’s API keys from your account settings.
1: Create API keys
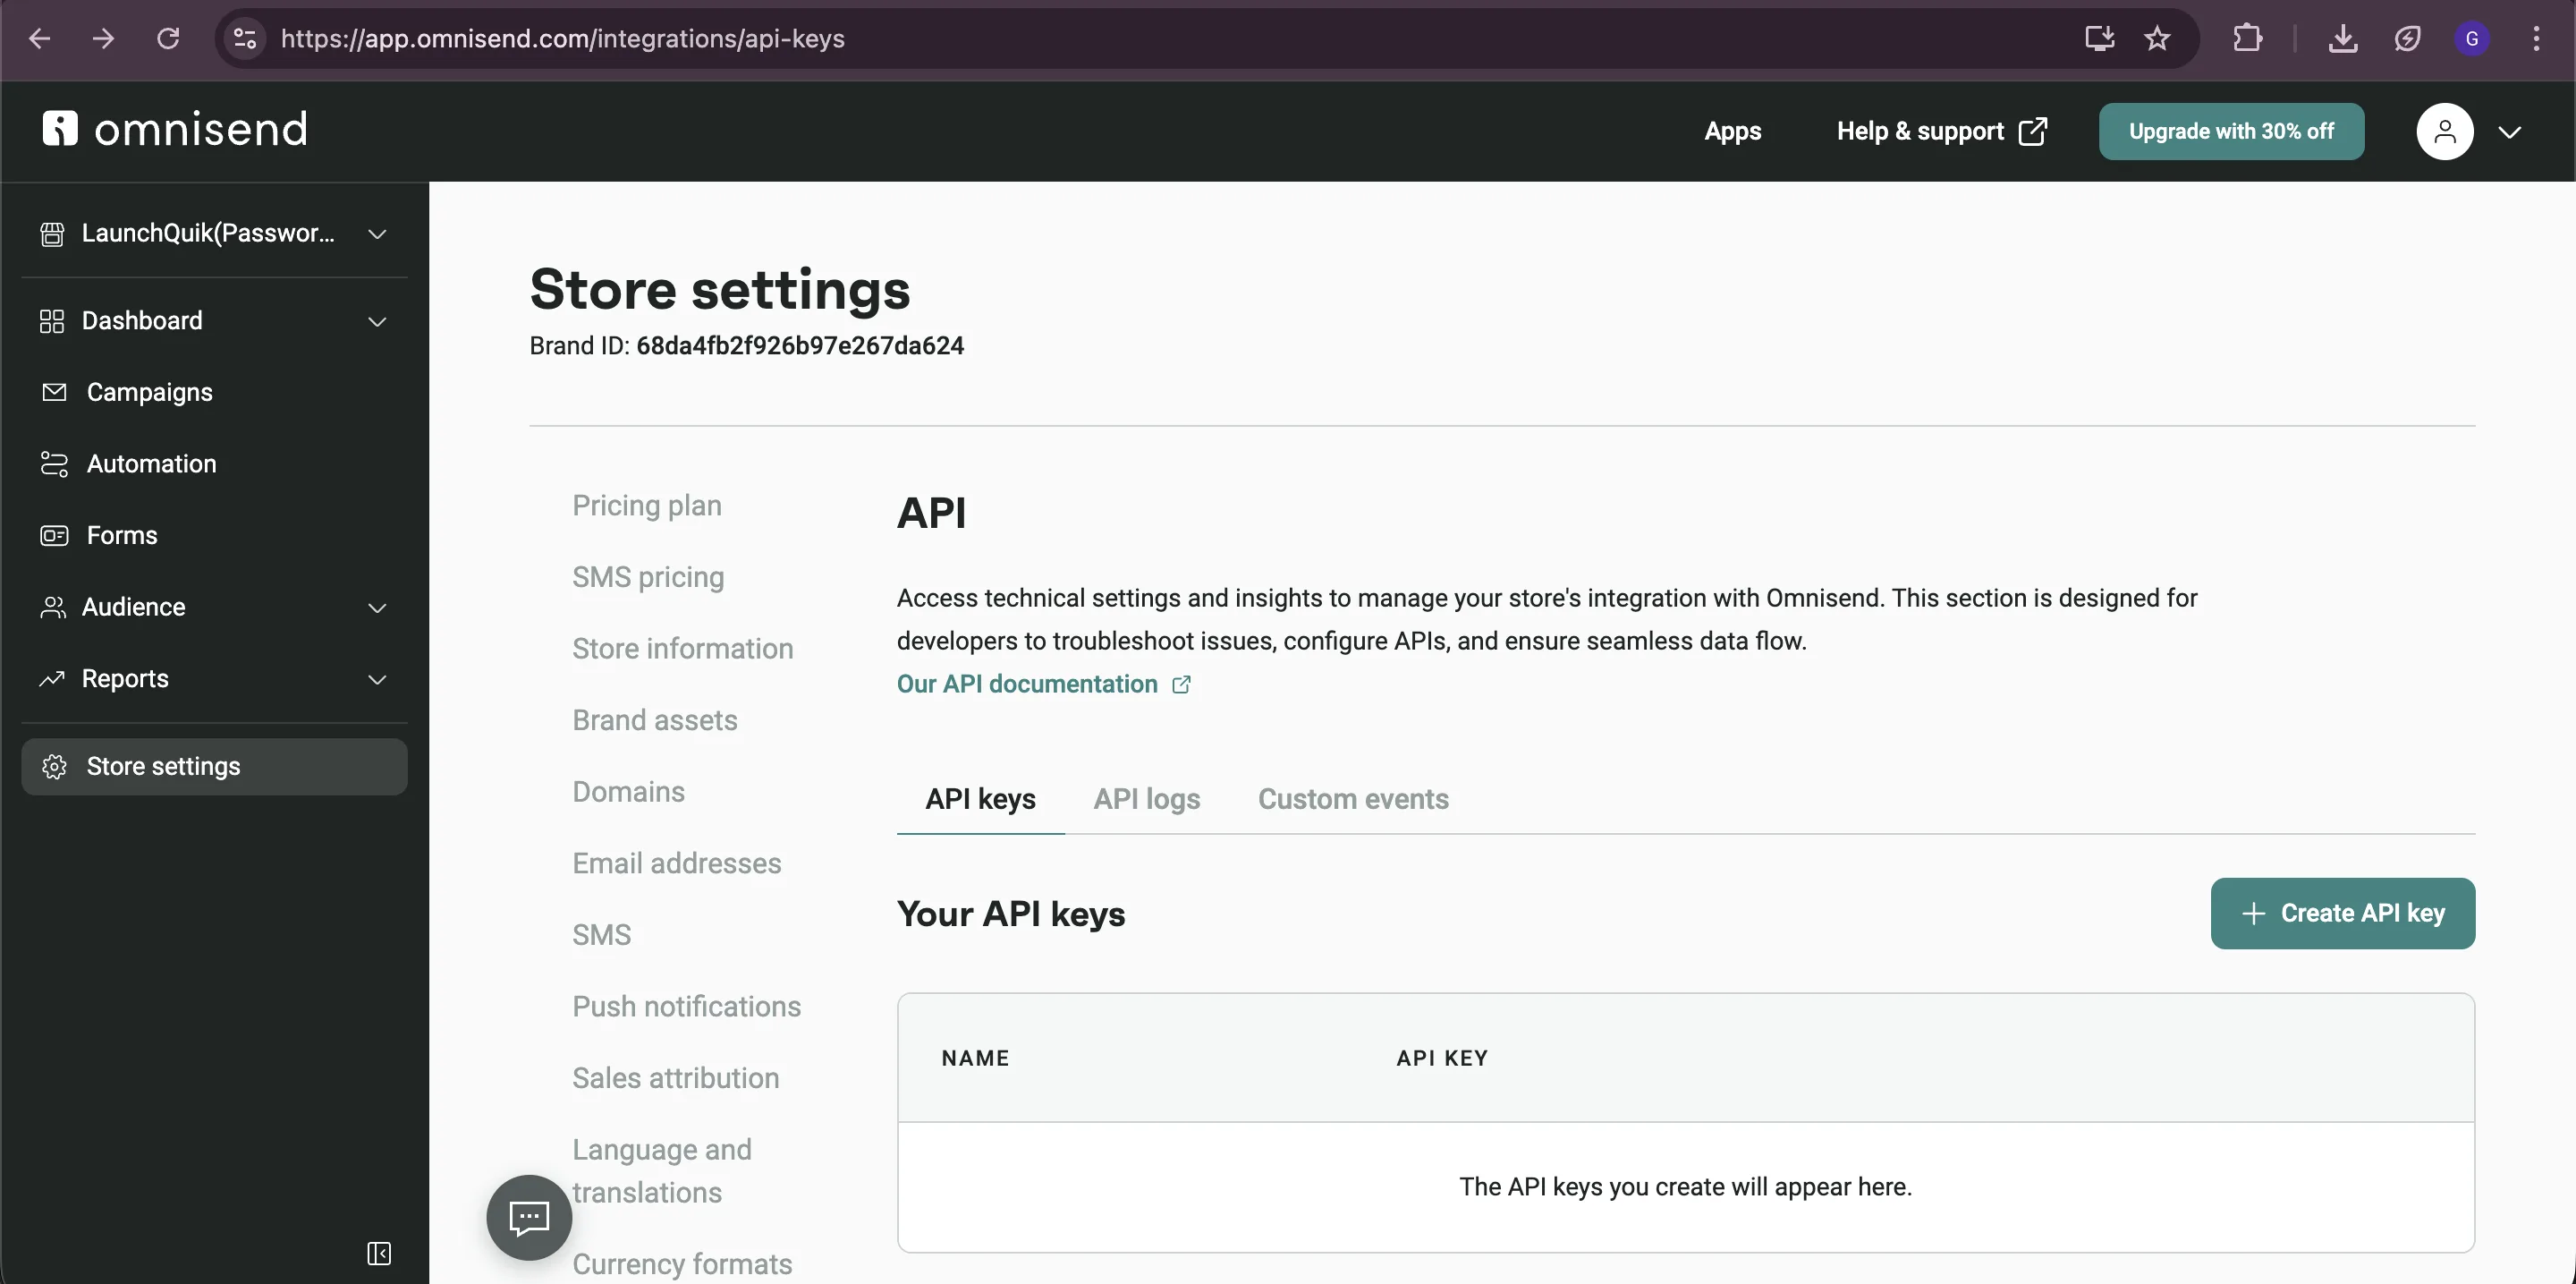
Section titled “1: Create API keys”- Open Omnisend Email & SMS reorder reminders & SMS from Shopify admin. In the left panel, click on Store Settings.
- Scroll down and click on API in the left menu.
- Click on + Create API key.
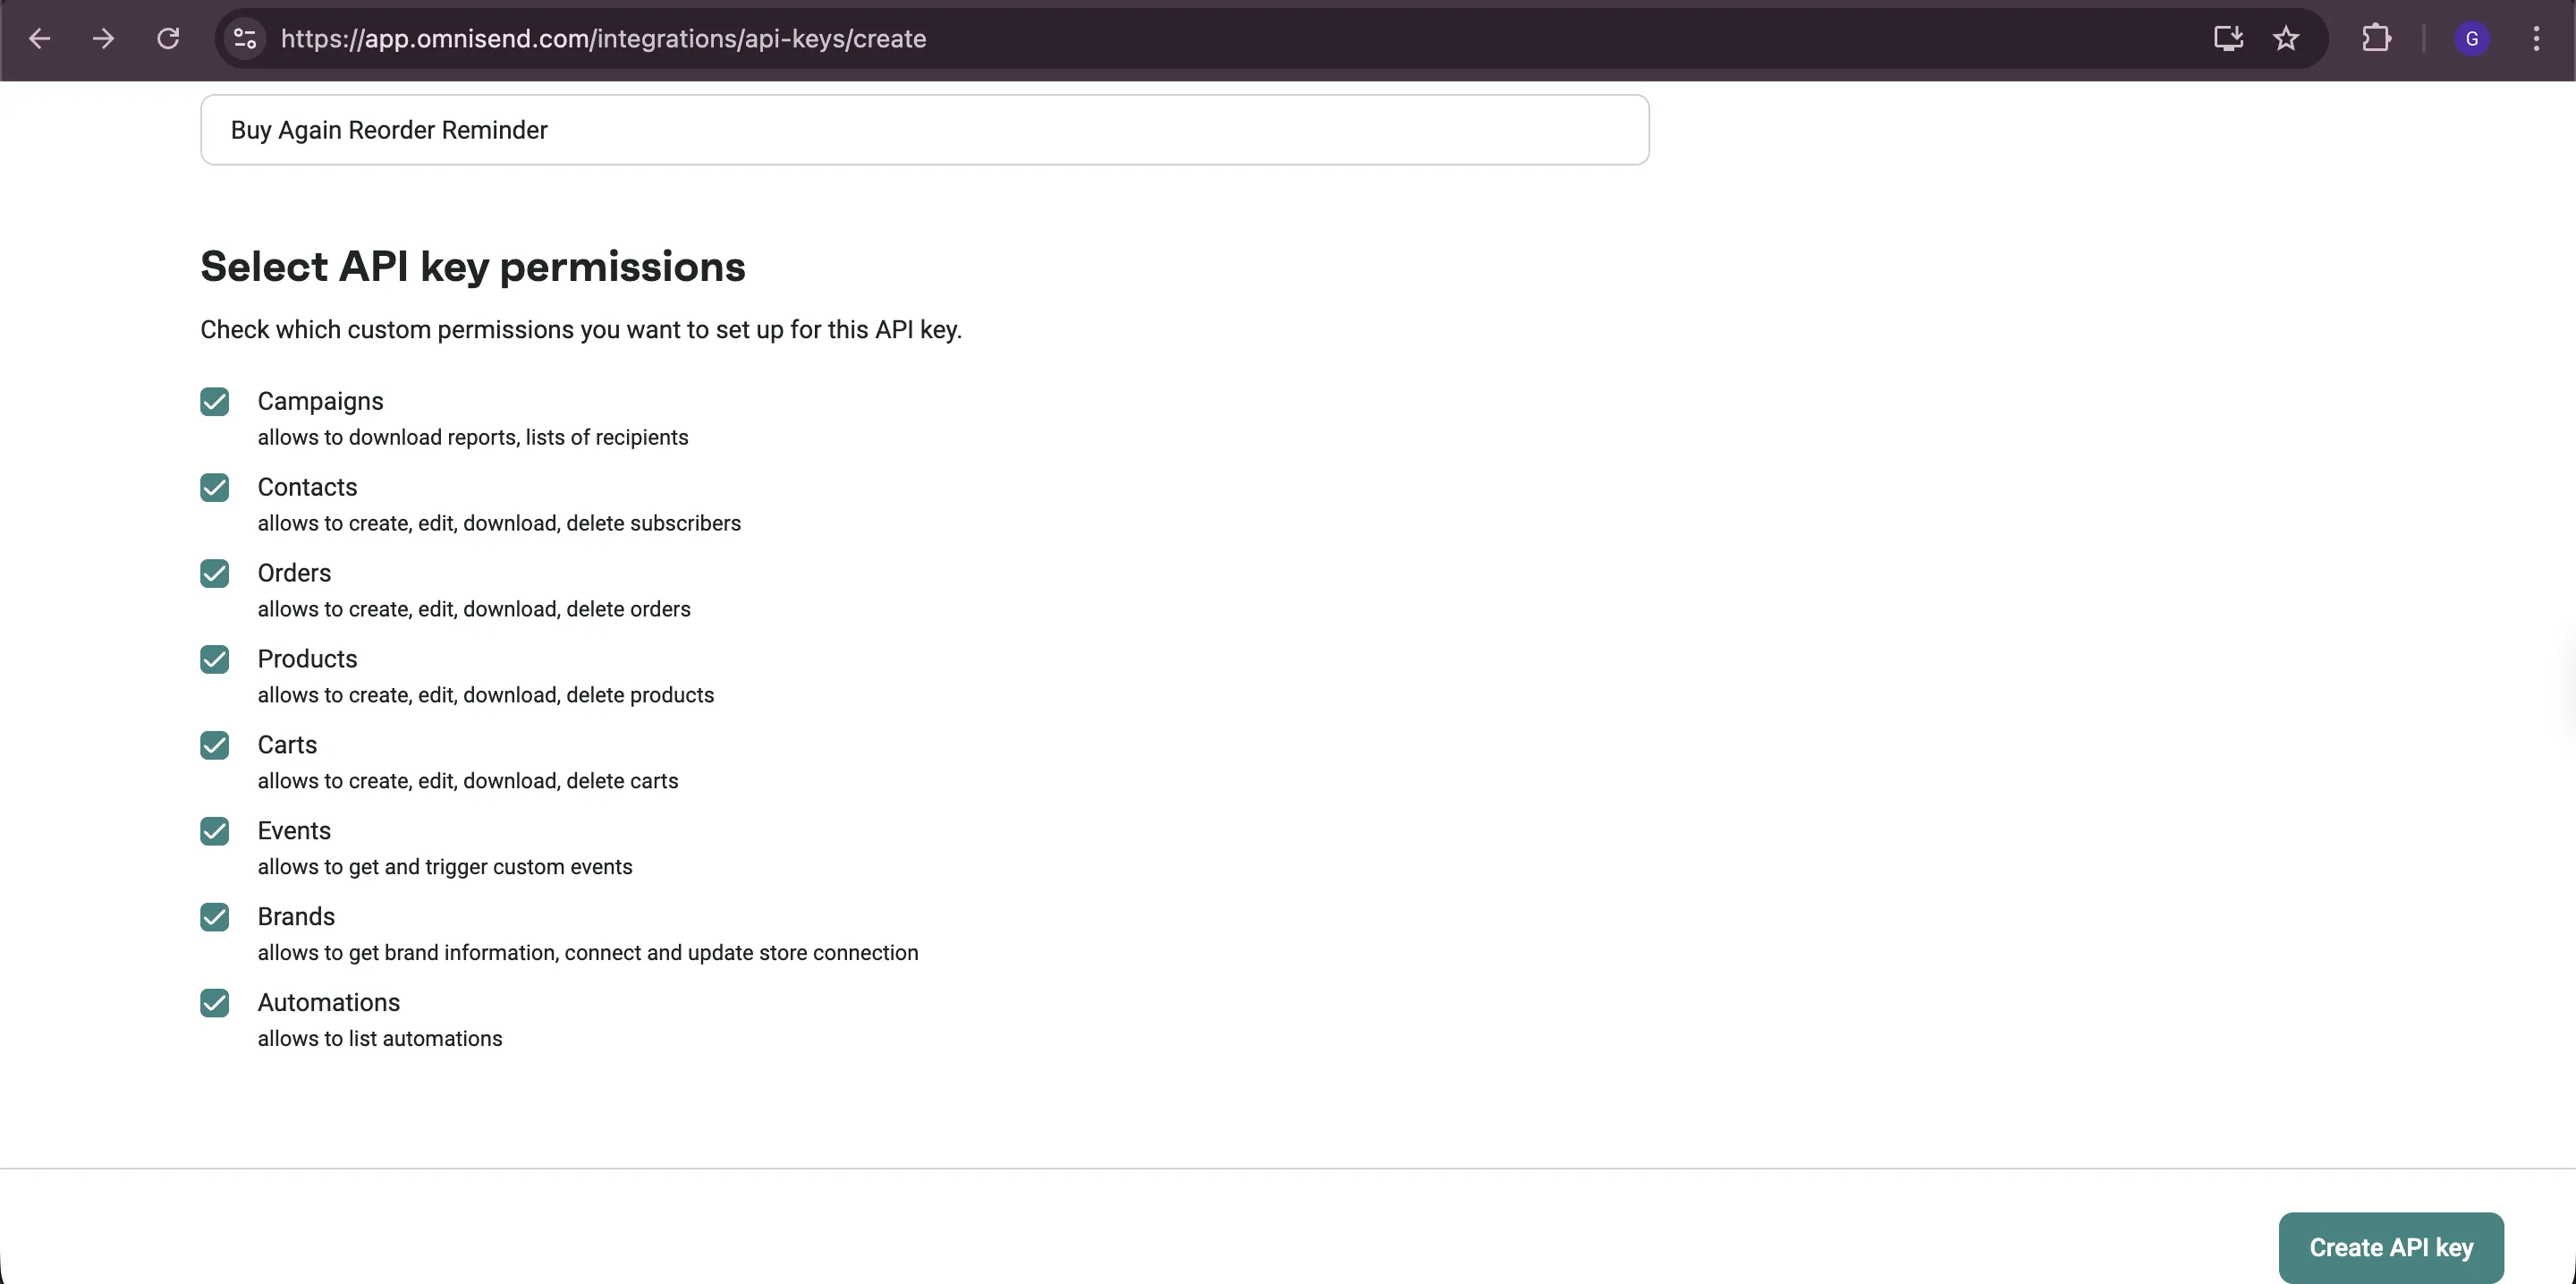
- Name the API key as Buy Again Reorder Reminder.
- Select Full access permissions.
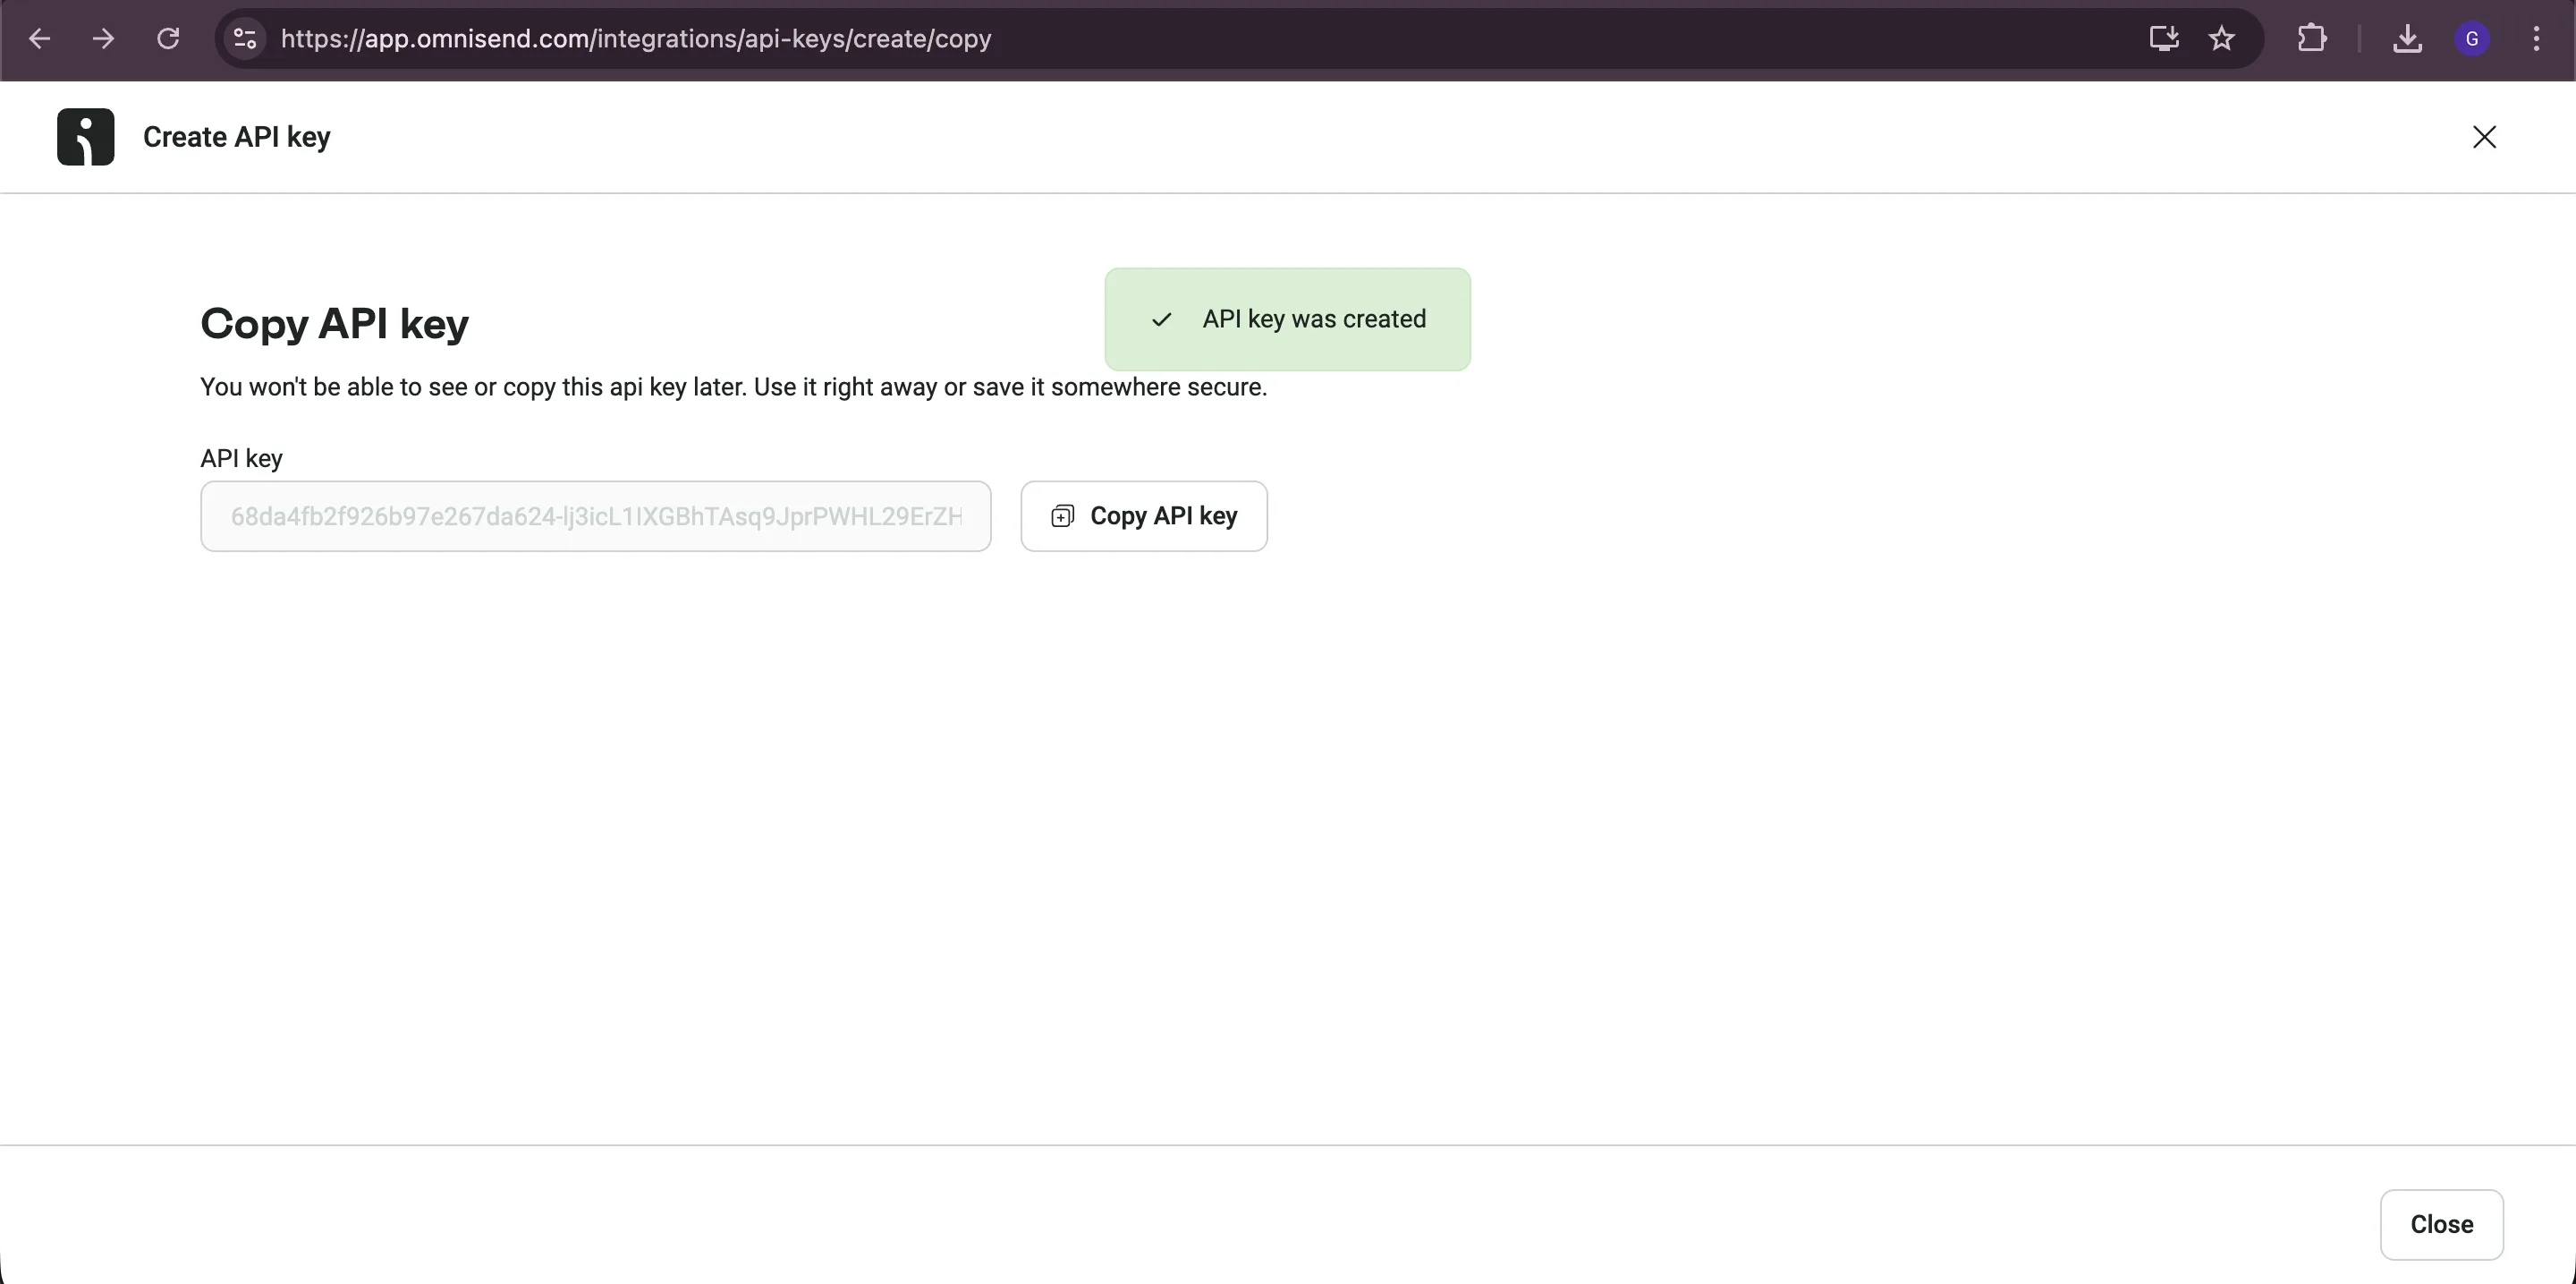
- Click on Create API key.
- Copy the API key generated immediately as you won’t be able to see it again. You’ll need to paste it into the Buy Again - Reorder Reminders app settings.
2: Integrate Omnisend with Buy Again & Reorder Reminder
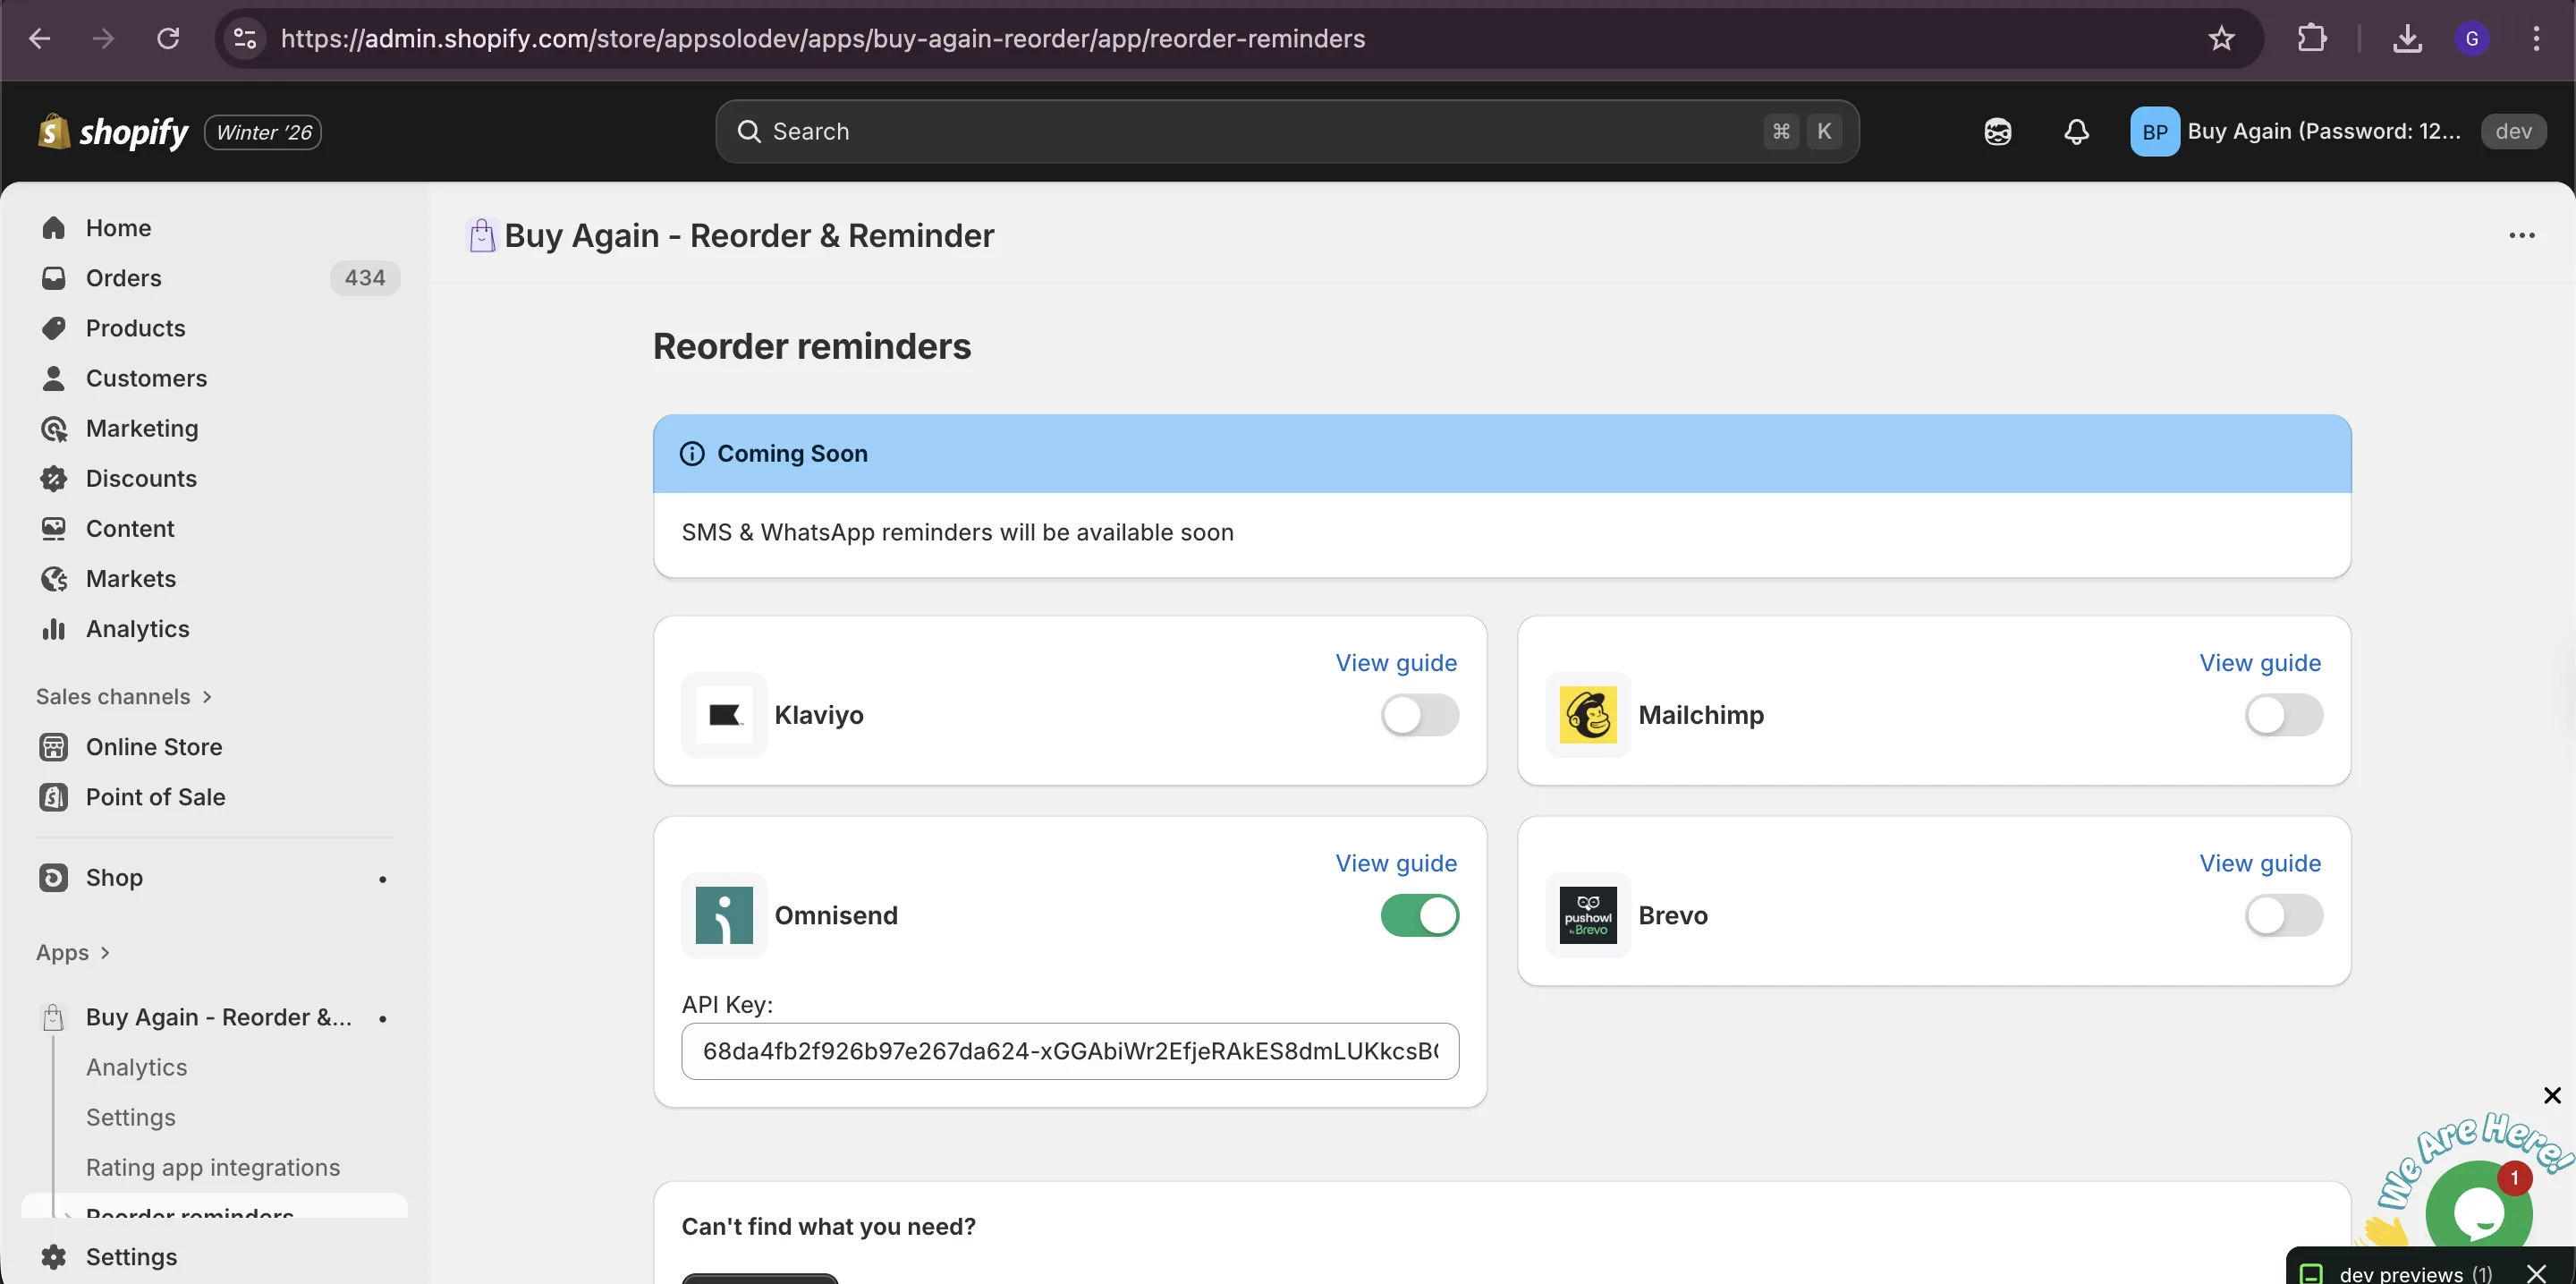
Section titled “2: Integrate Omnisend with Buy Again & Reorder Reminder”Copy the Omnisend API key you created and paste it in the Buy Again & Reorder Reminder app settings.
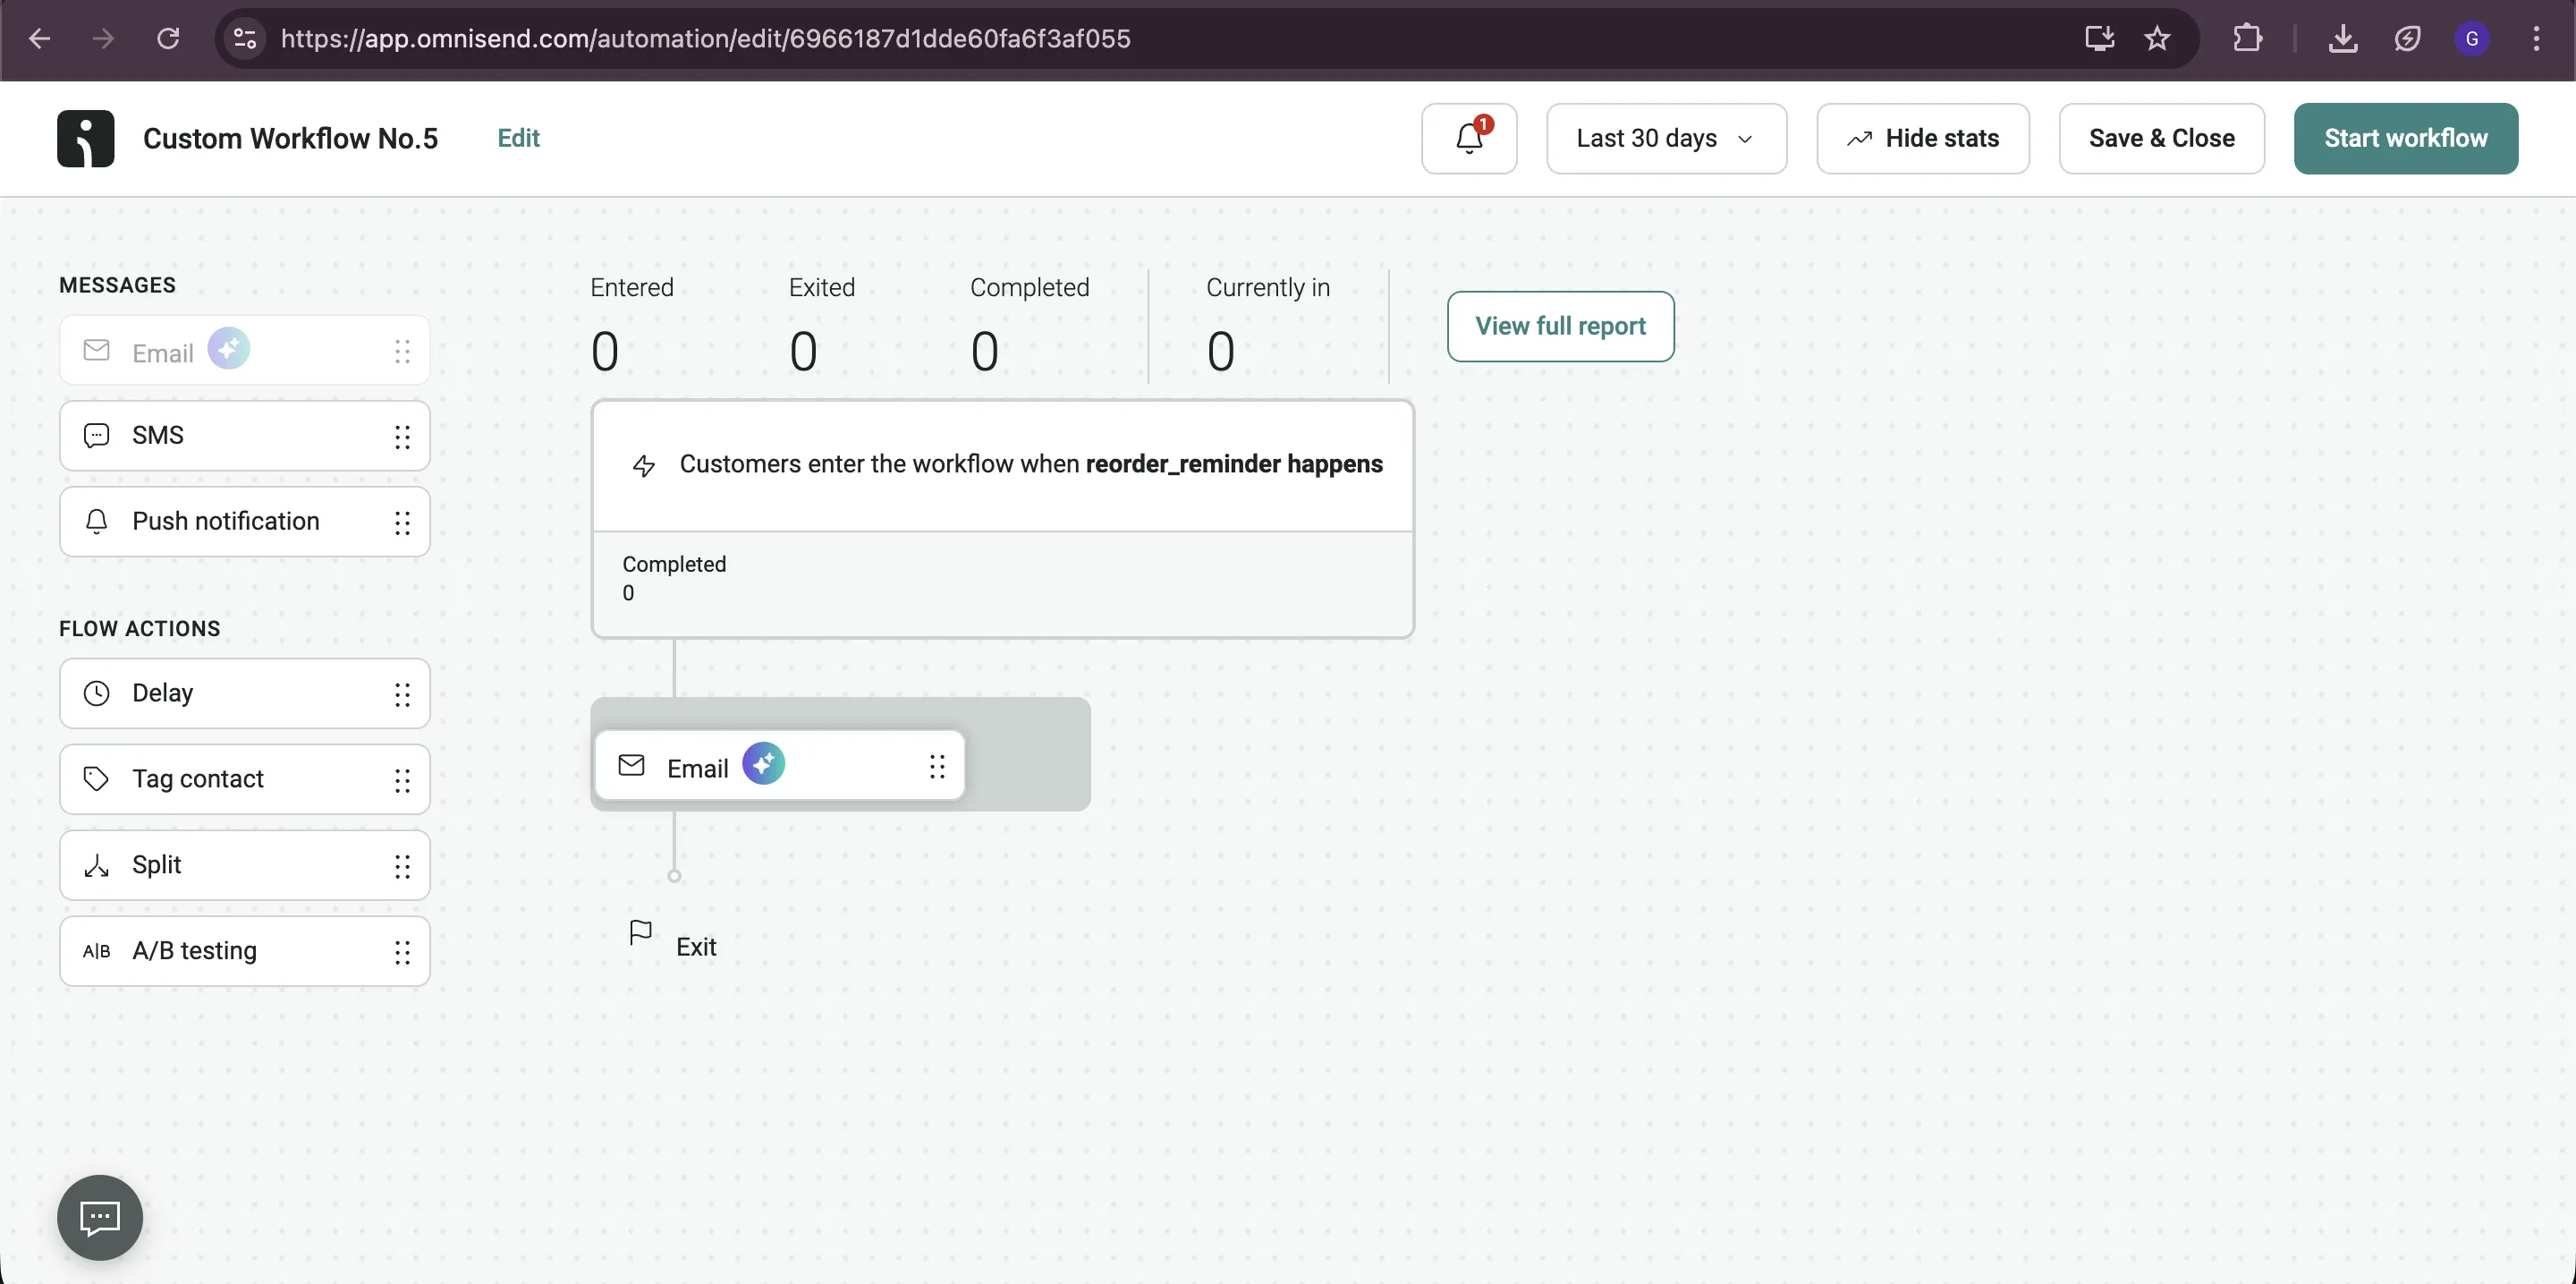
Step 2: Create an automation in Omnisend for reorder reminders
Section titled “Step 2: Create an automation in Omnisend for reorder reminders”1: Create Automation
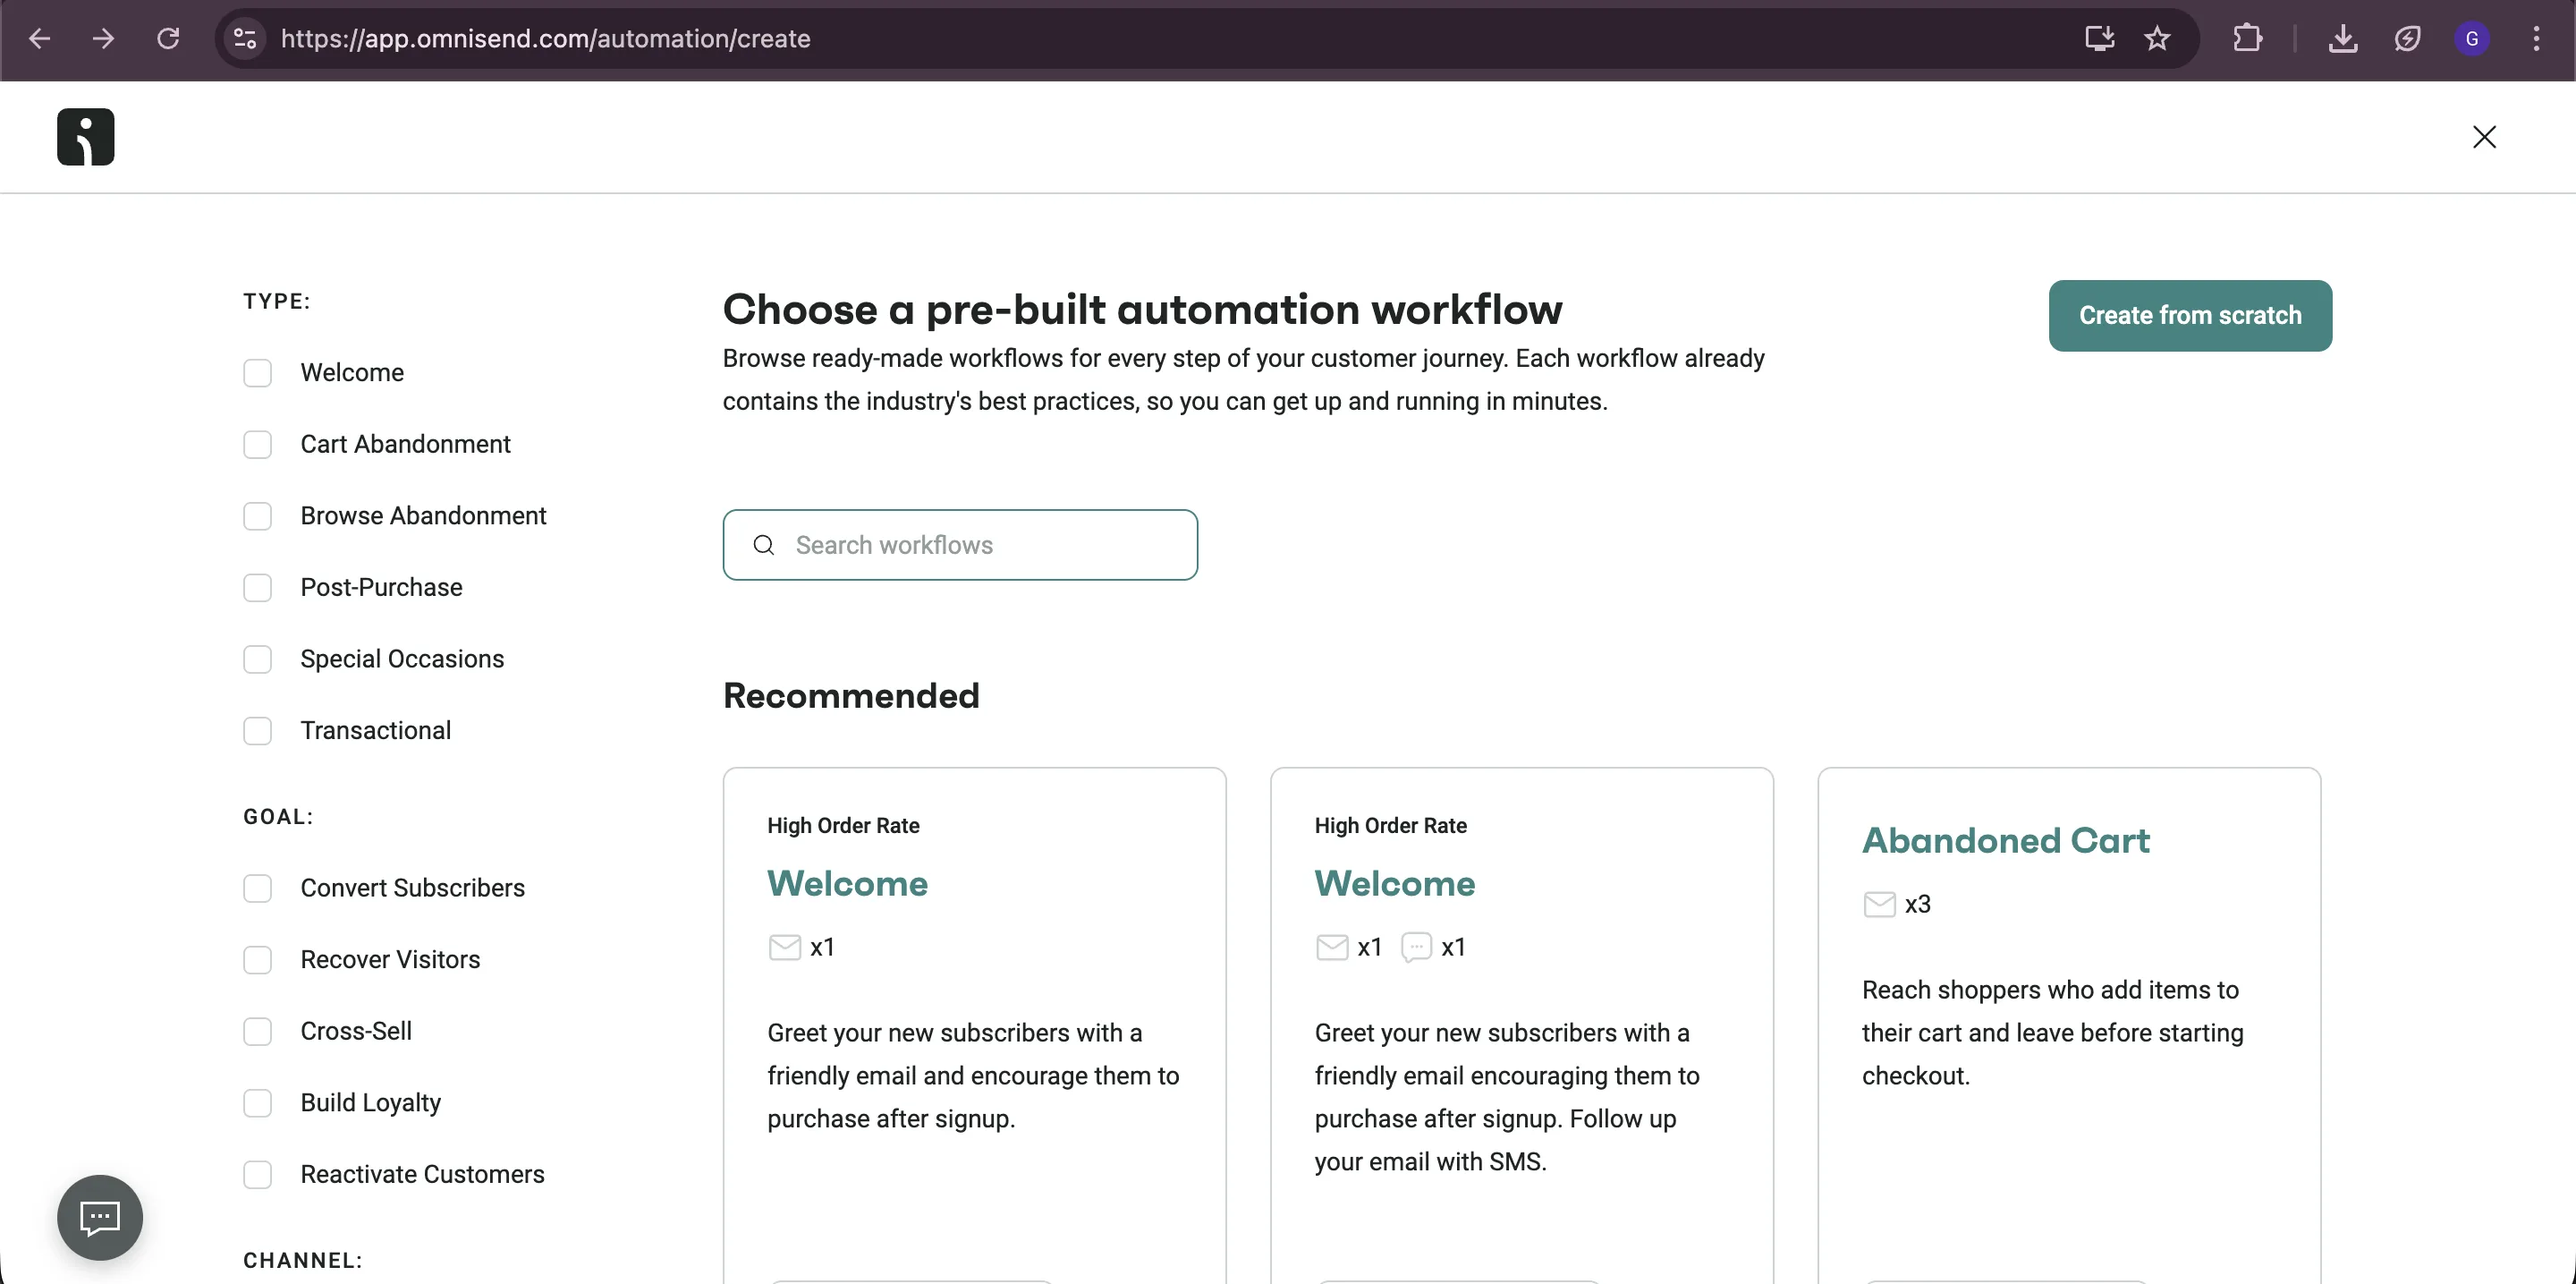
Section titled “1: Create Automation”- In Omnisend, go to Automation in the left menu.
- Click on + Create workflow in the top right corner and then click Create from scratch in the top right corner.
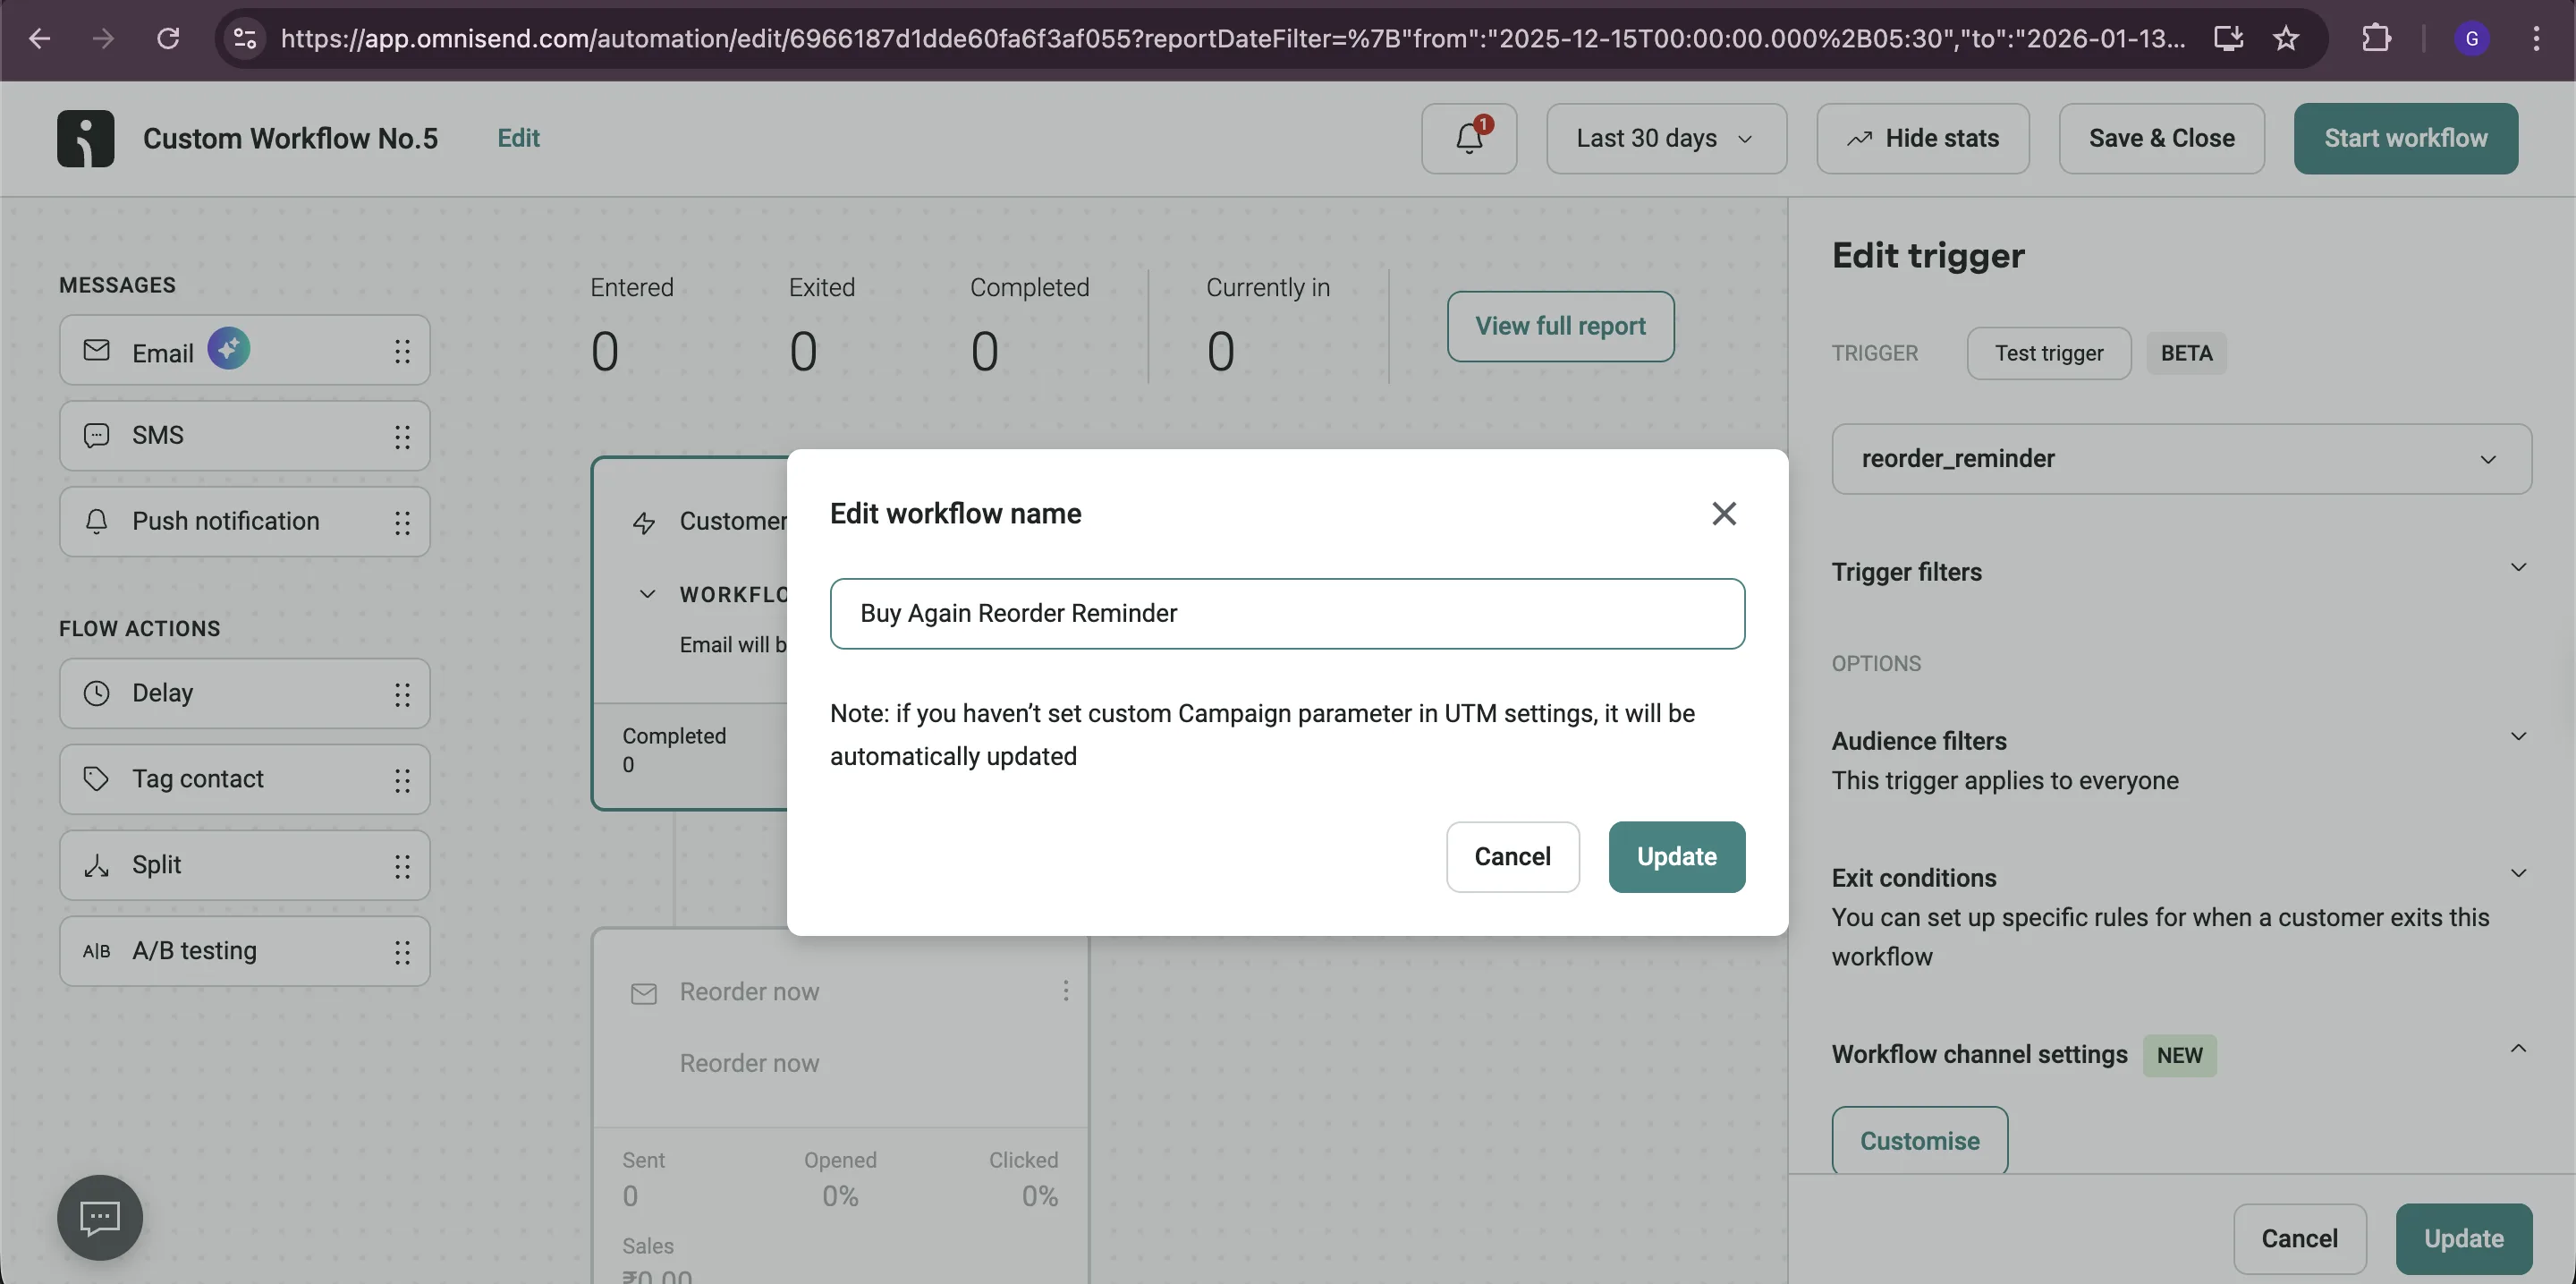
2: Choose Trigger
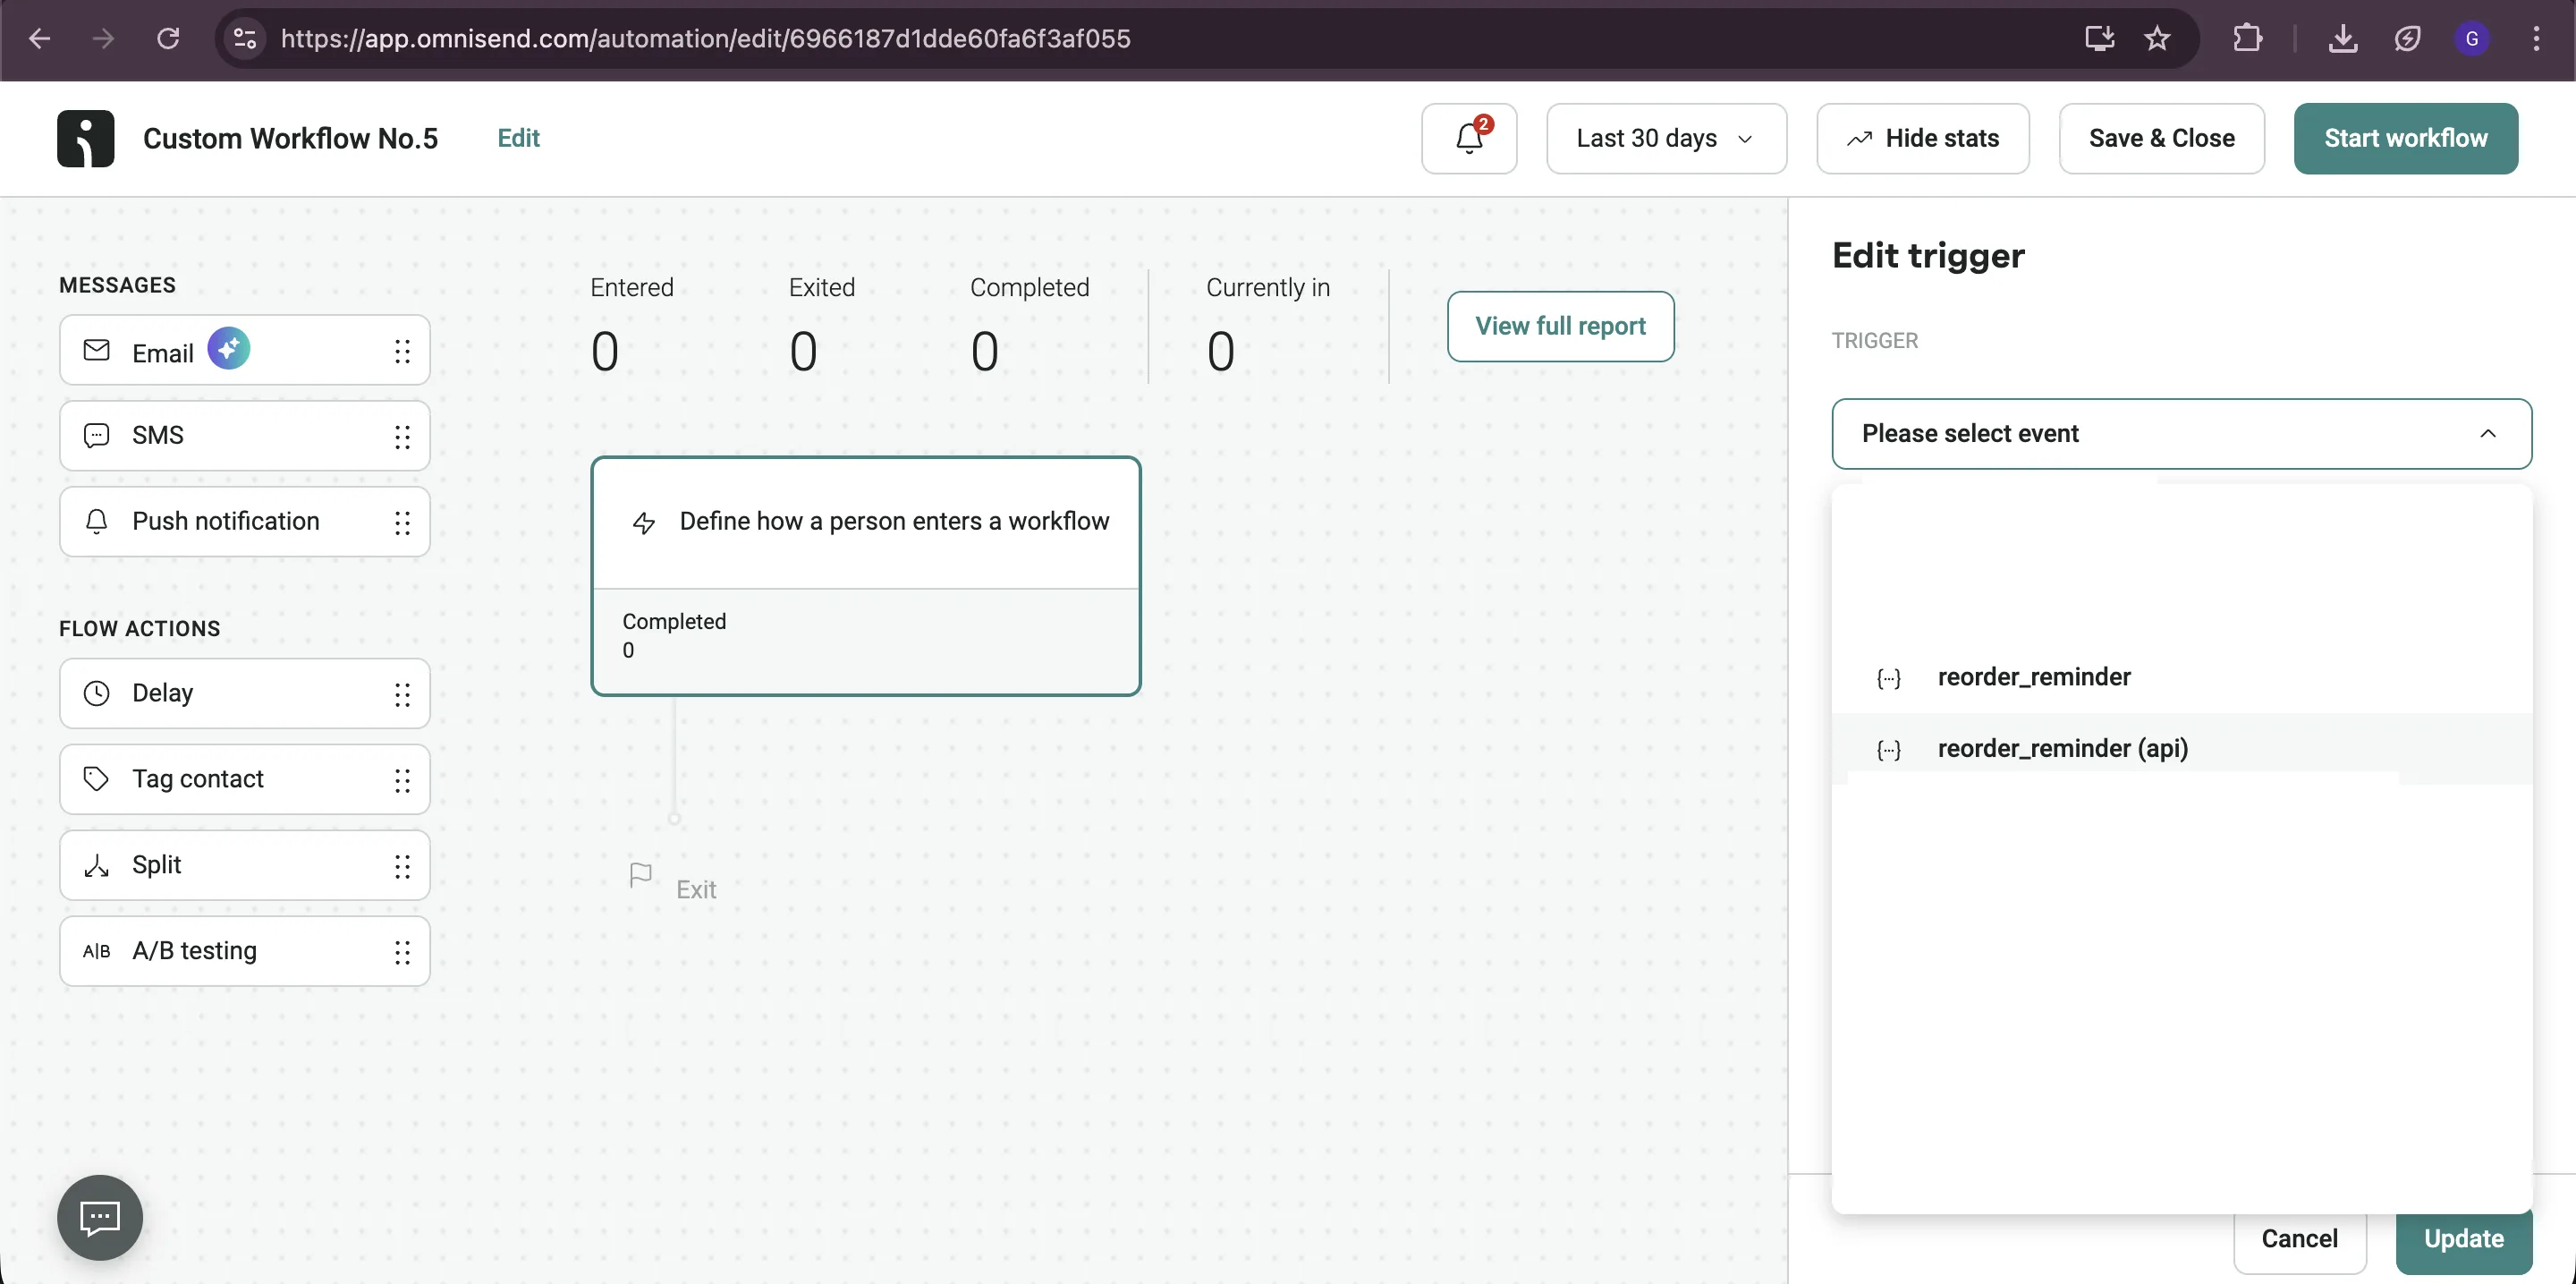
Section titled “2: Choose Trigger”- From the right panel, there is a trigger dropdown. Select reorder_reminder (api) under API section in the dropdown. Cross check that the trigger type is set to reorder_reminder (api).
3: Add Email Action
Section titled “3: Add Email Action”- In the automation editor, drag and drop email from the left panel.
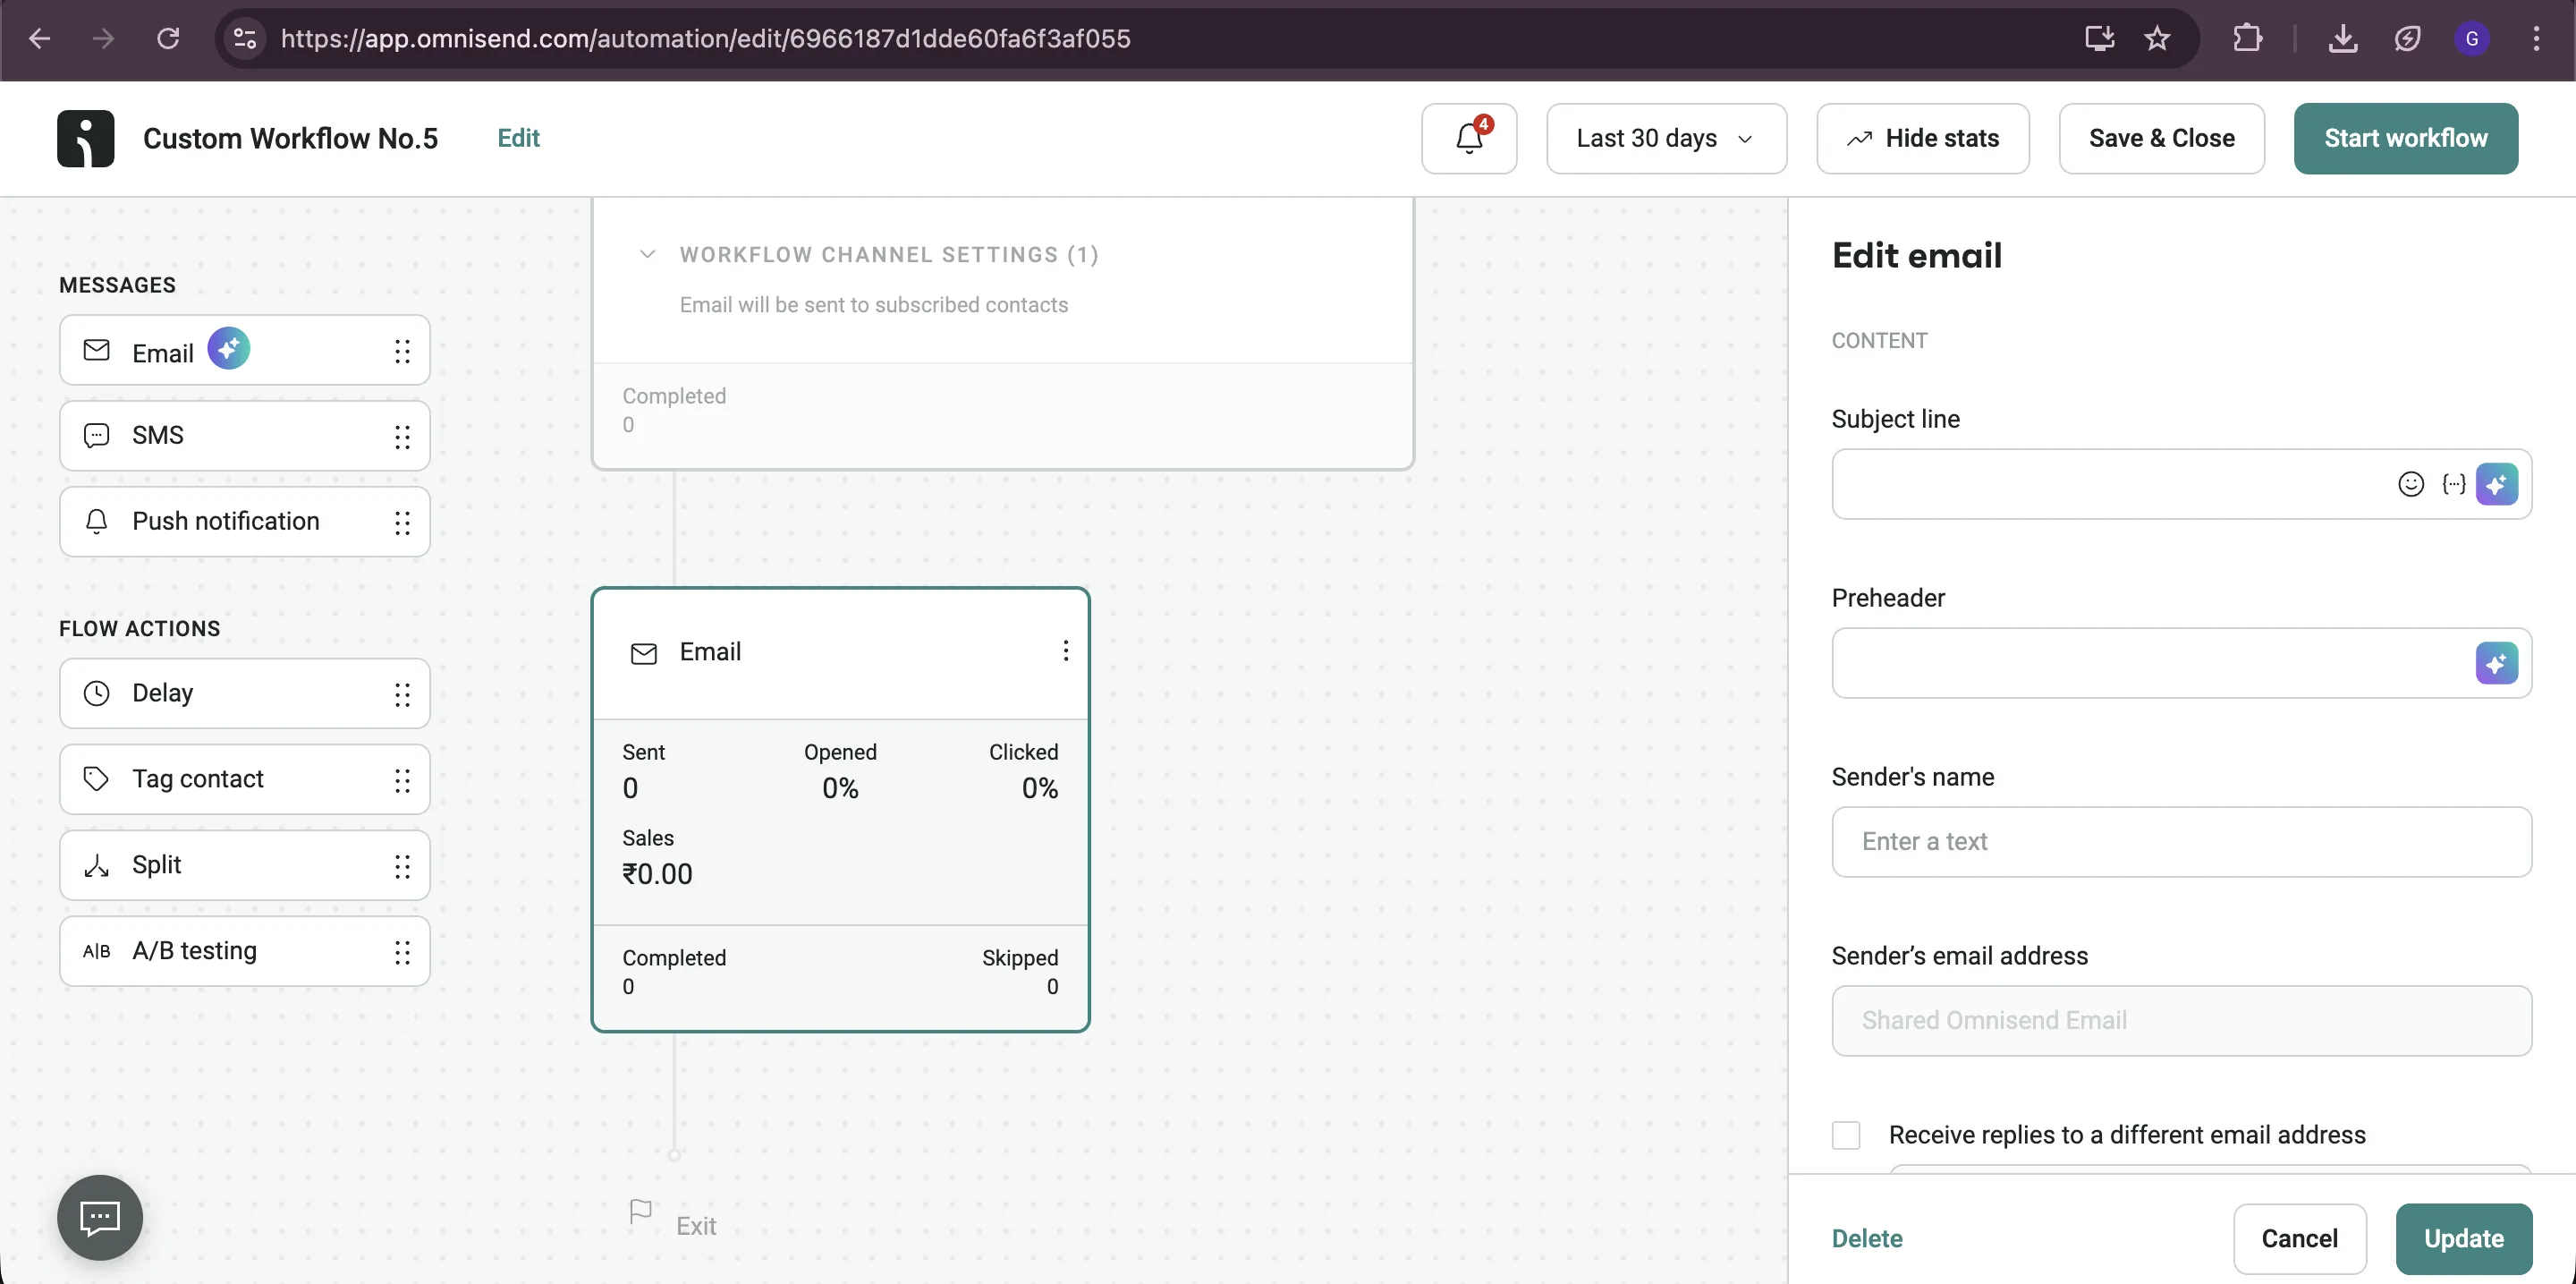
4: Configure Email Settings
Section titled “4: Configure Email Settings”- Click on the email action to open settings.
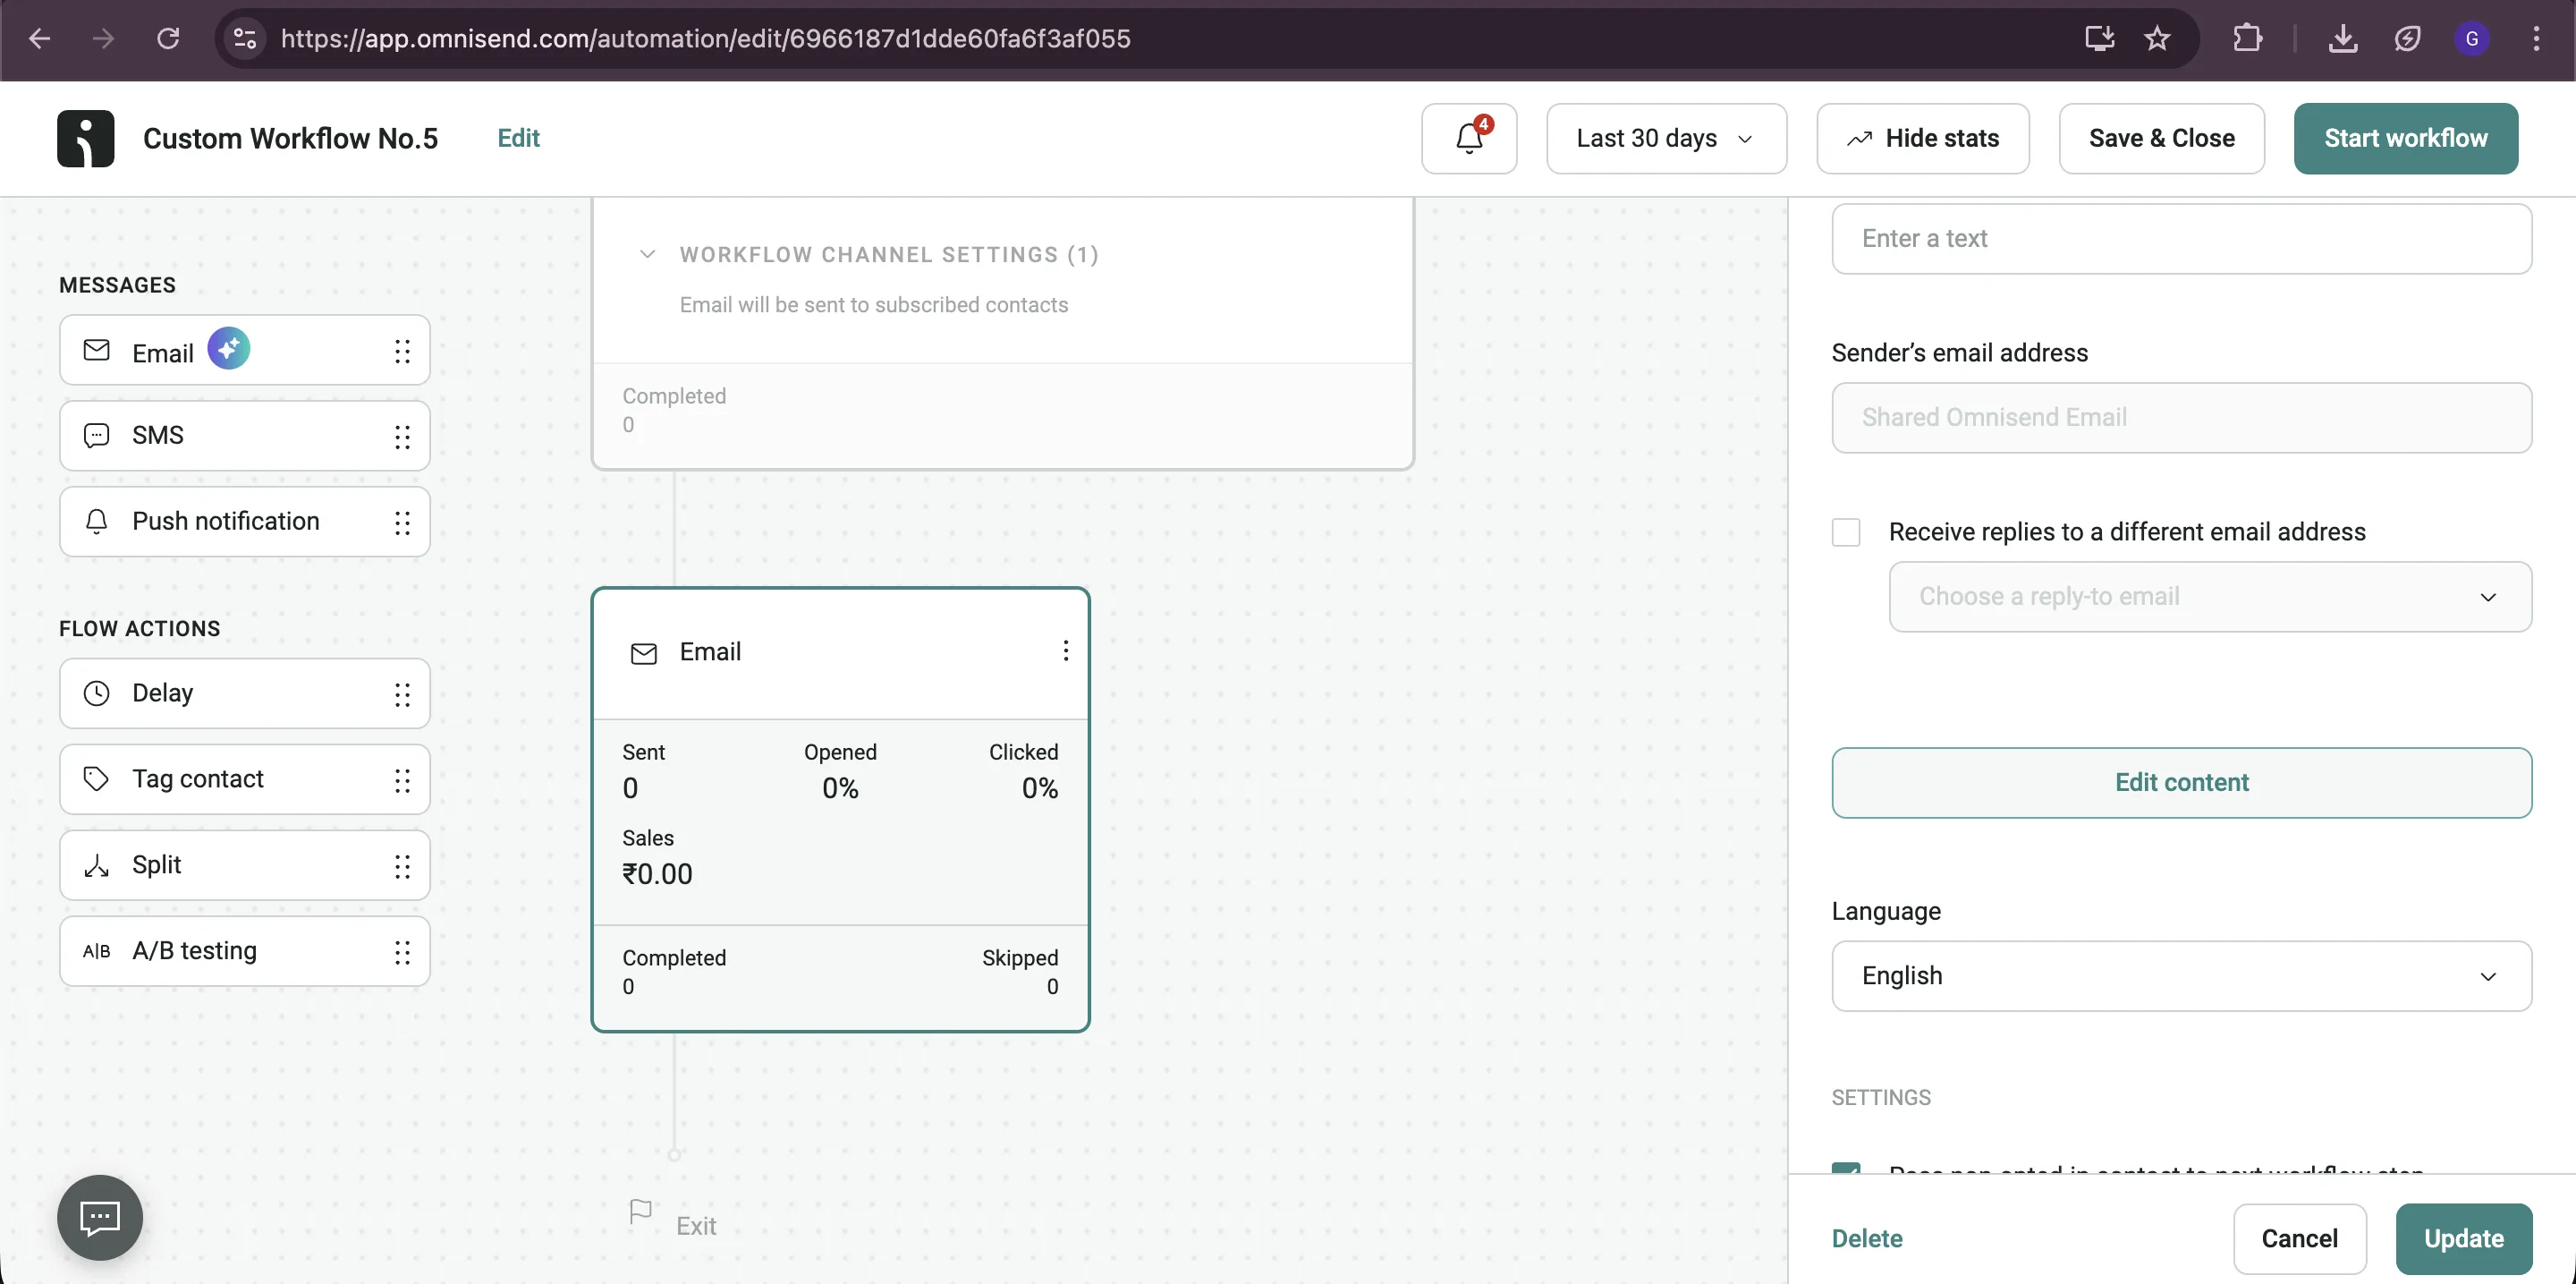
- On the right hand side, set Sender name and Sender email for your brand.
- Edit the Subject line and Preheader text for reorder reminders.
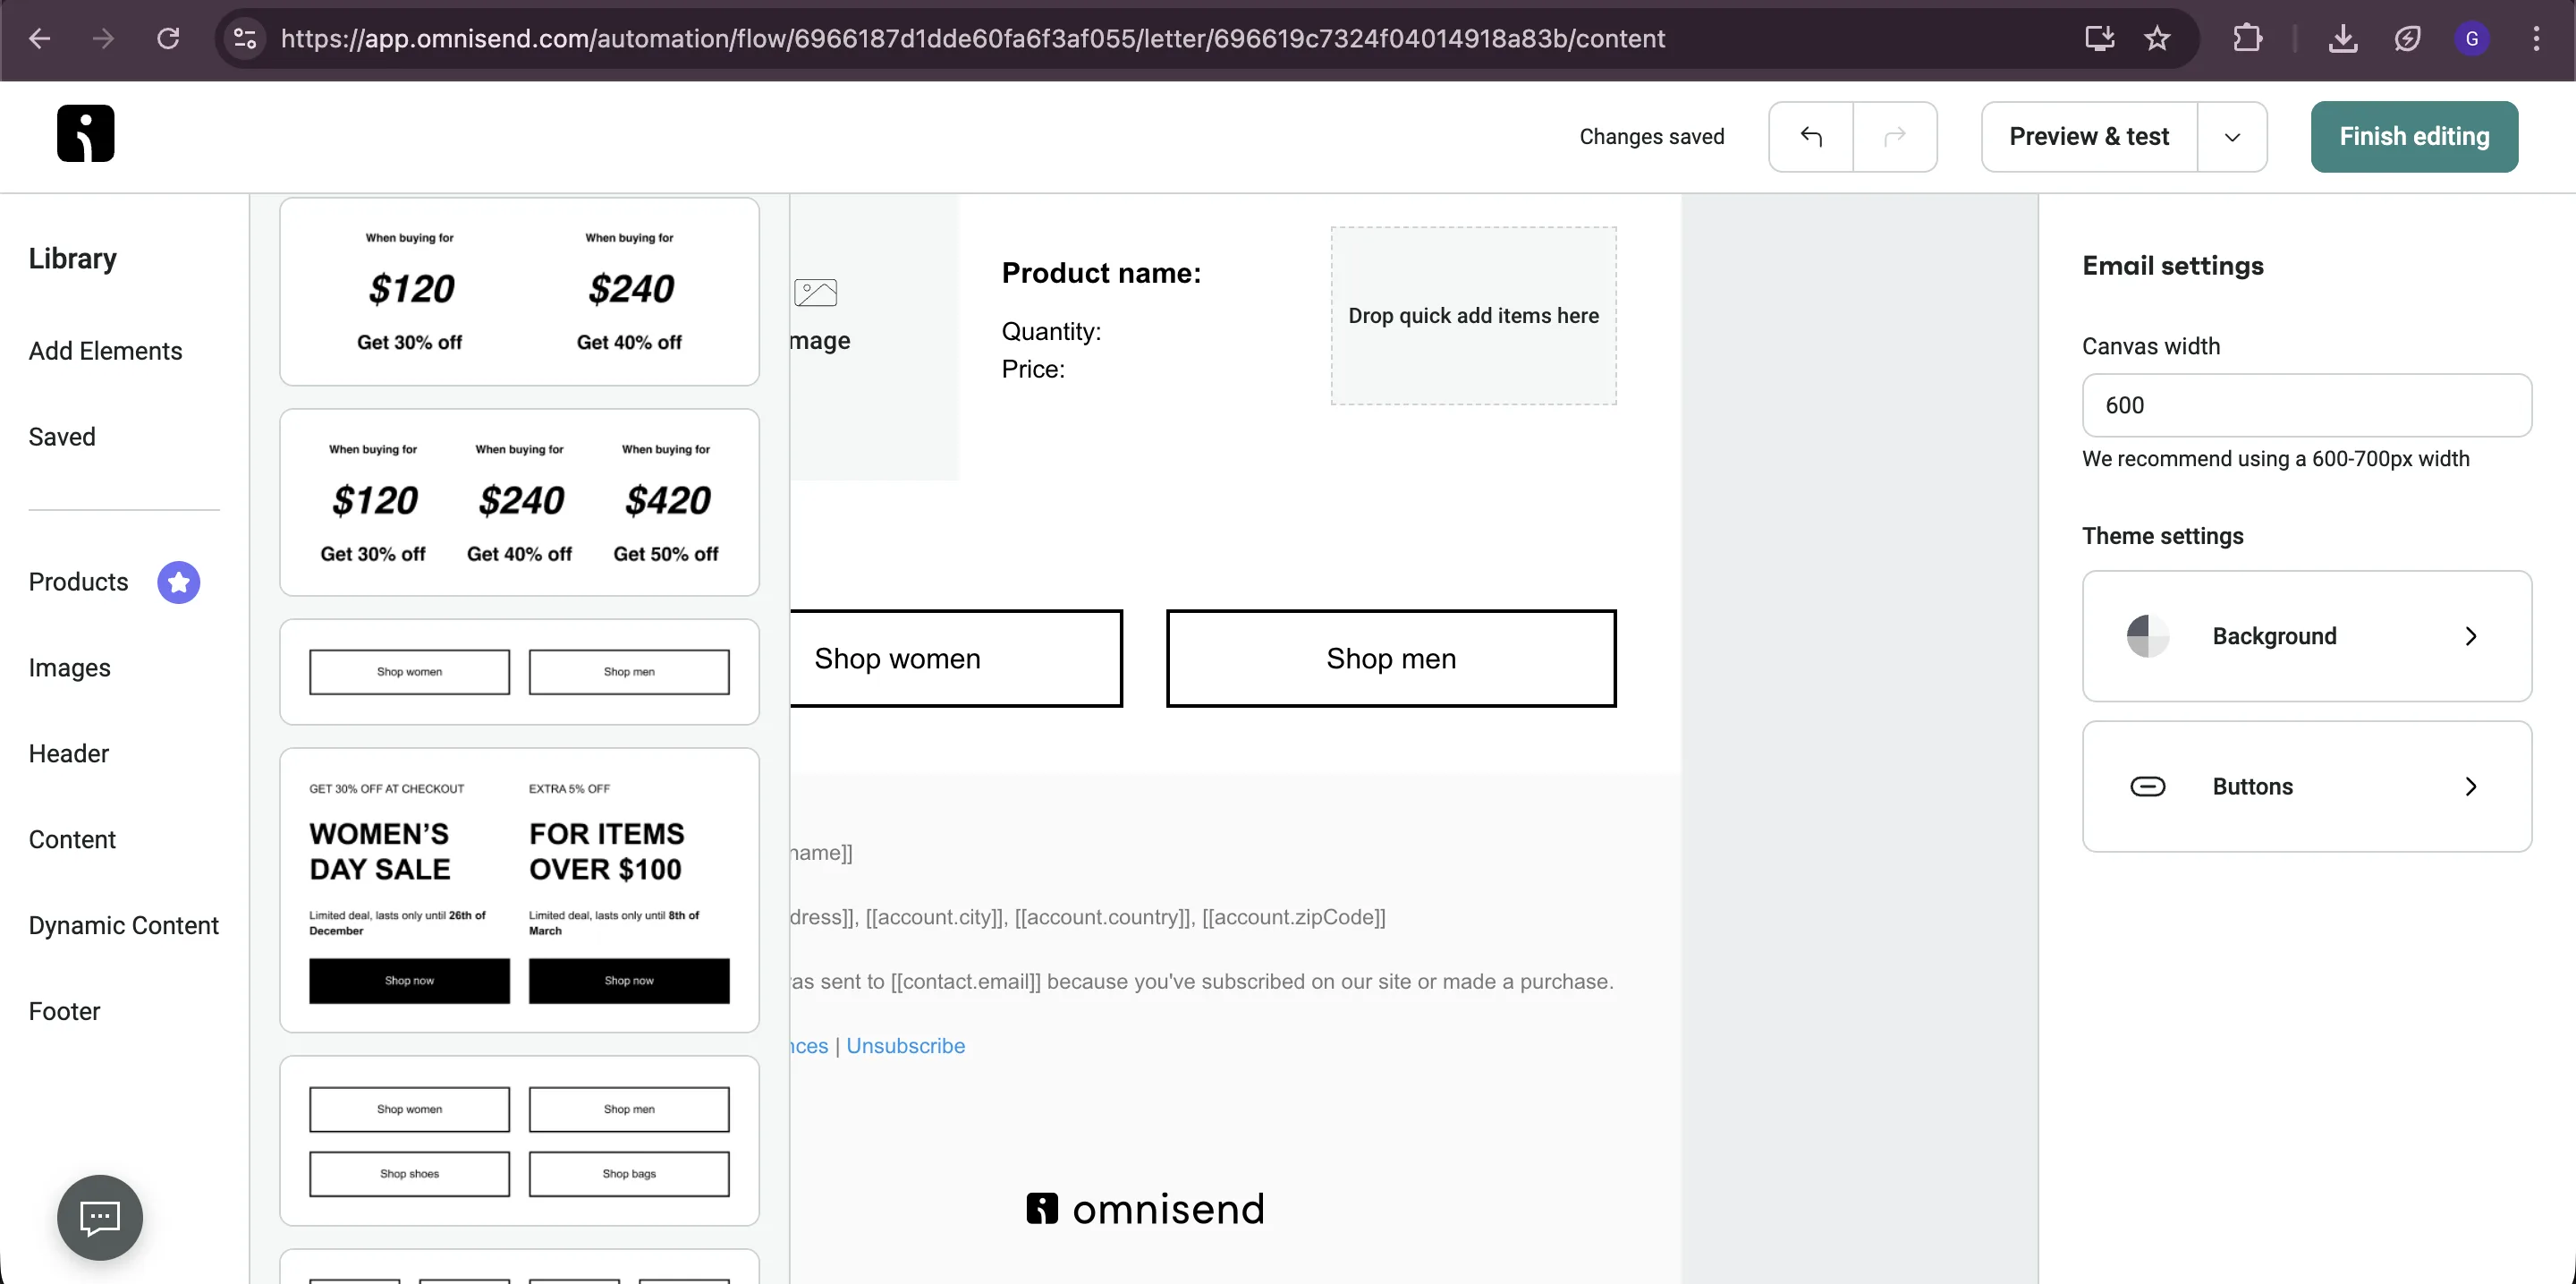
5: Edit Email Content
Section titled “5: Edit Email Content”- Click on Edit content to open the email editor. Make sure to save the settings first.
- Use the drag-and-drop editor to customize your email.
- To show order items, drag and drop the block from dynamic content in the left panel. Select the last one as it allows you to display order items vertically.
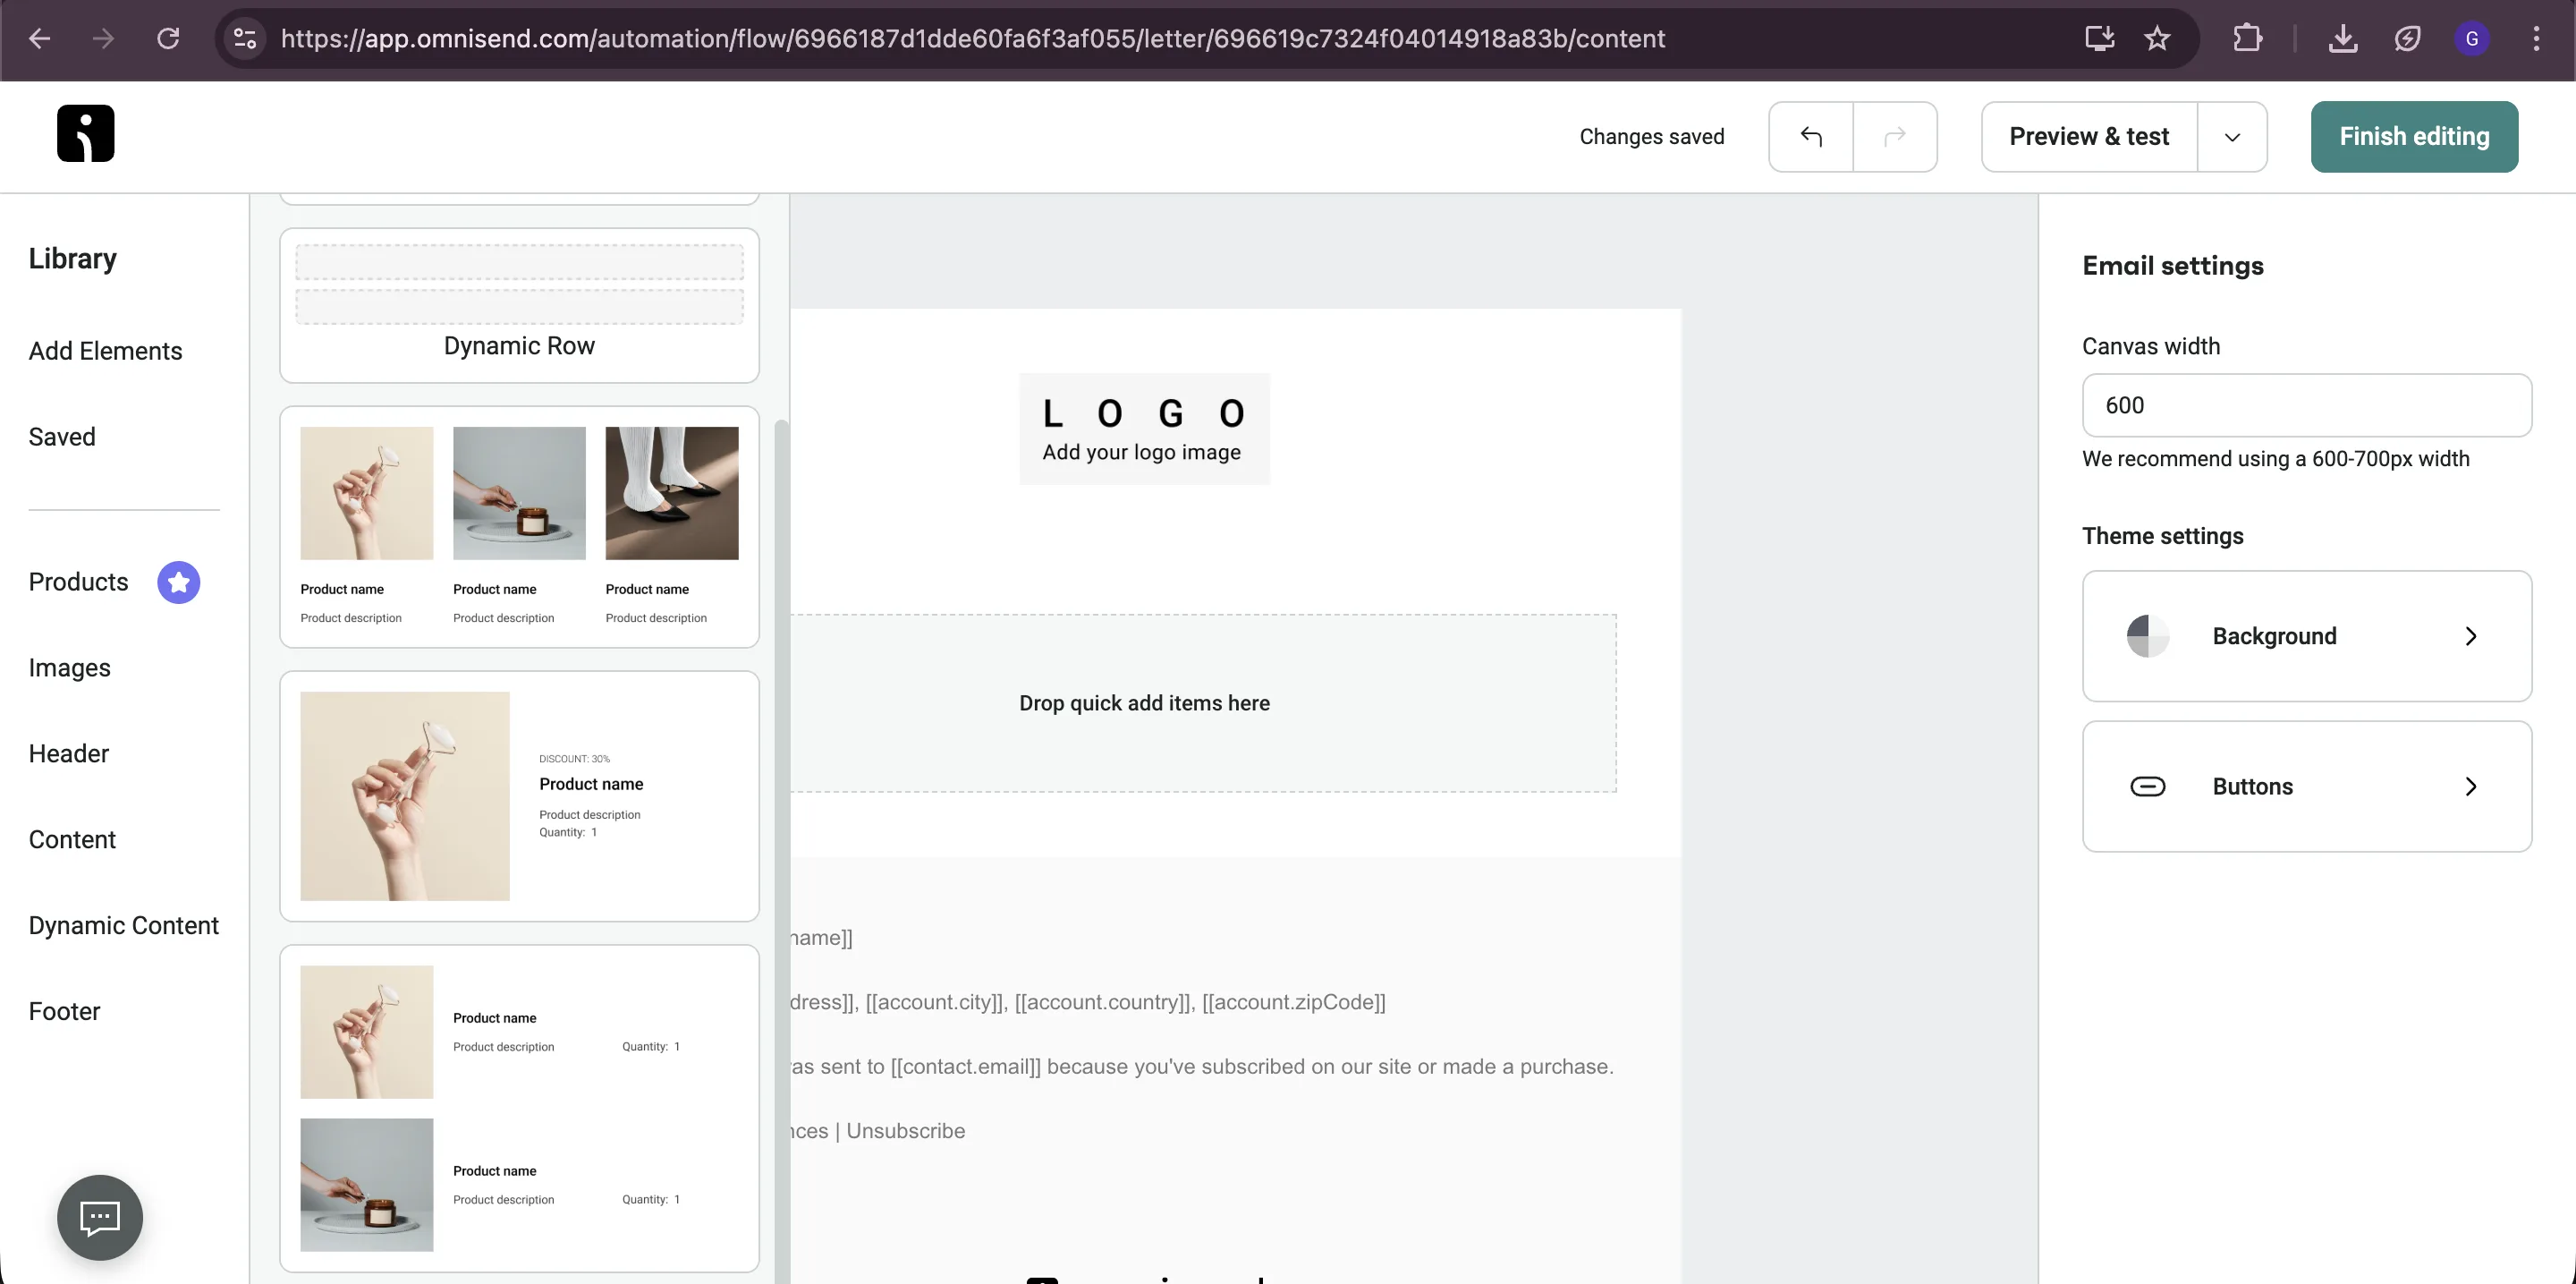
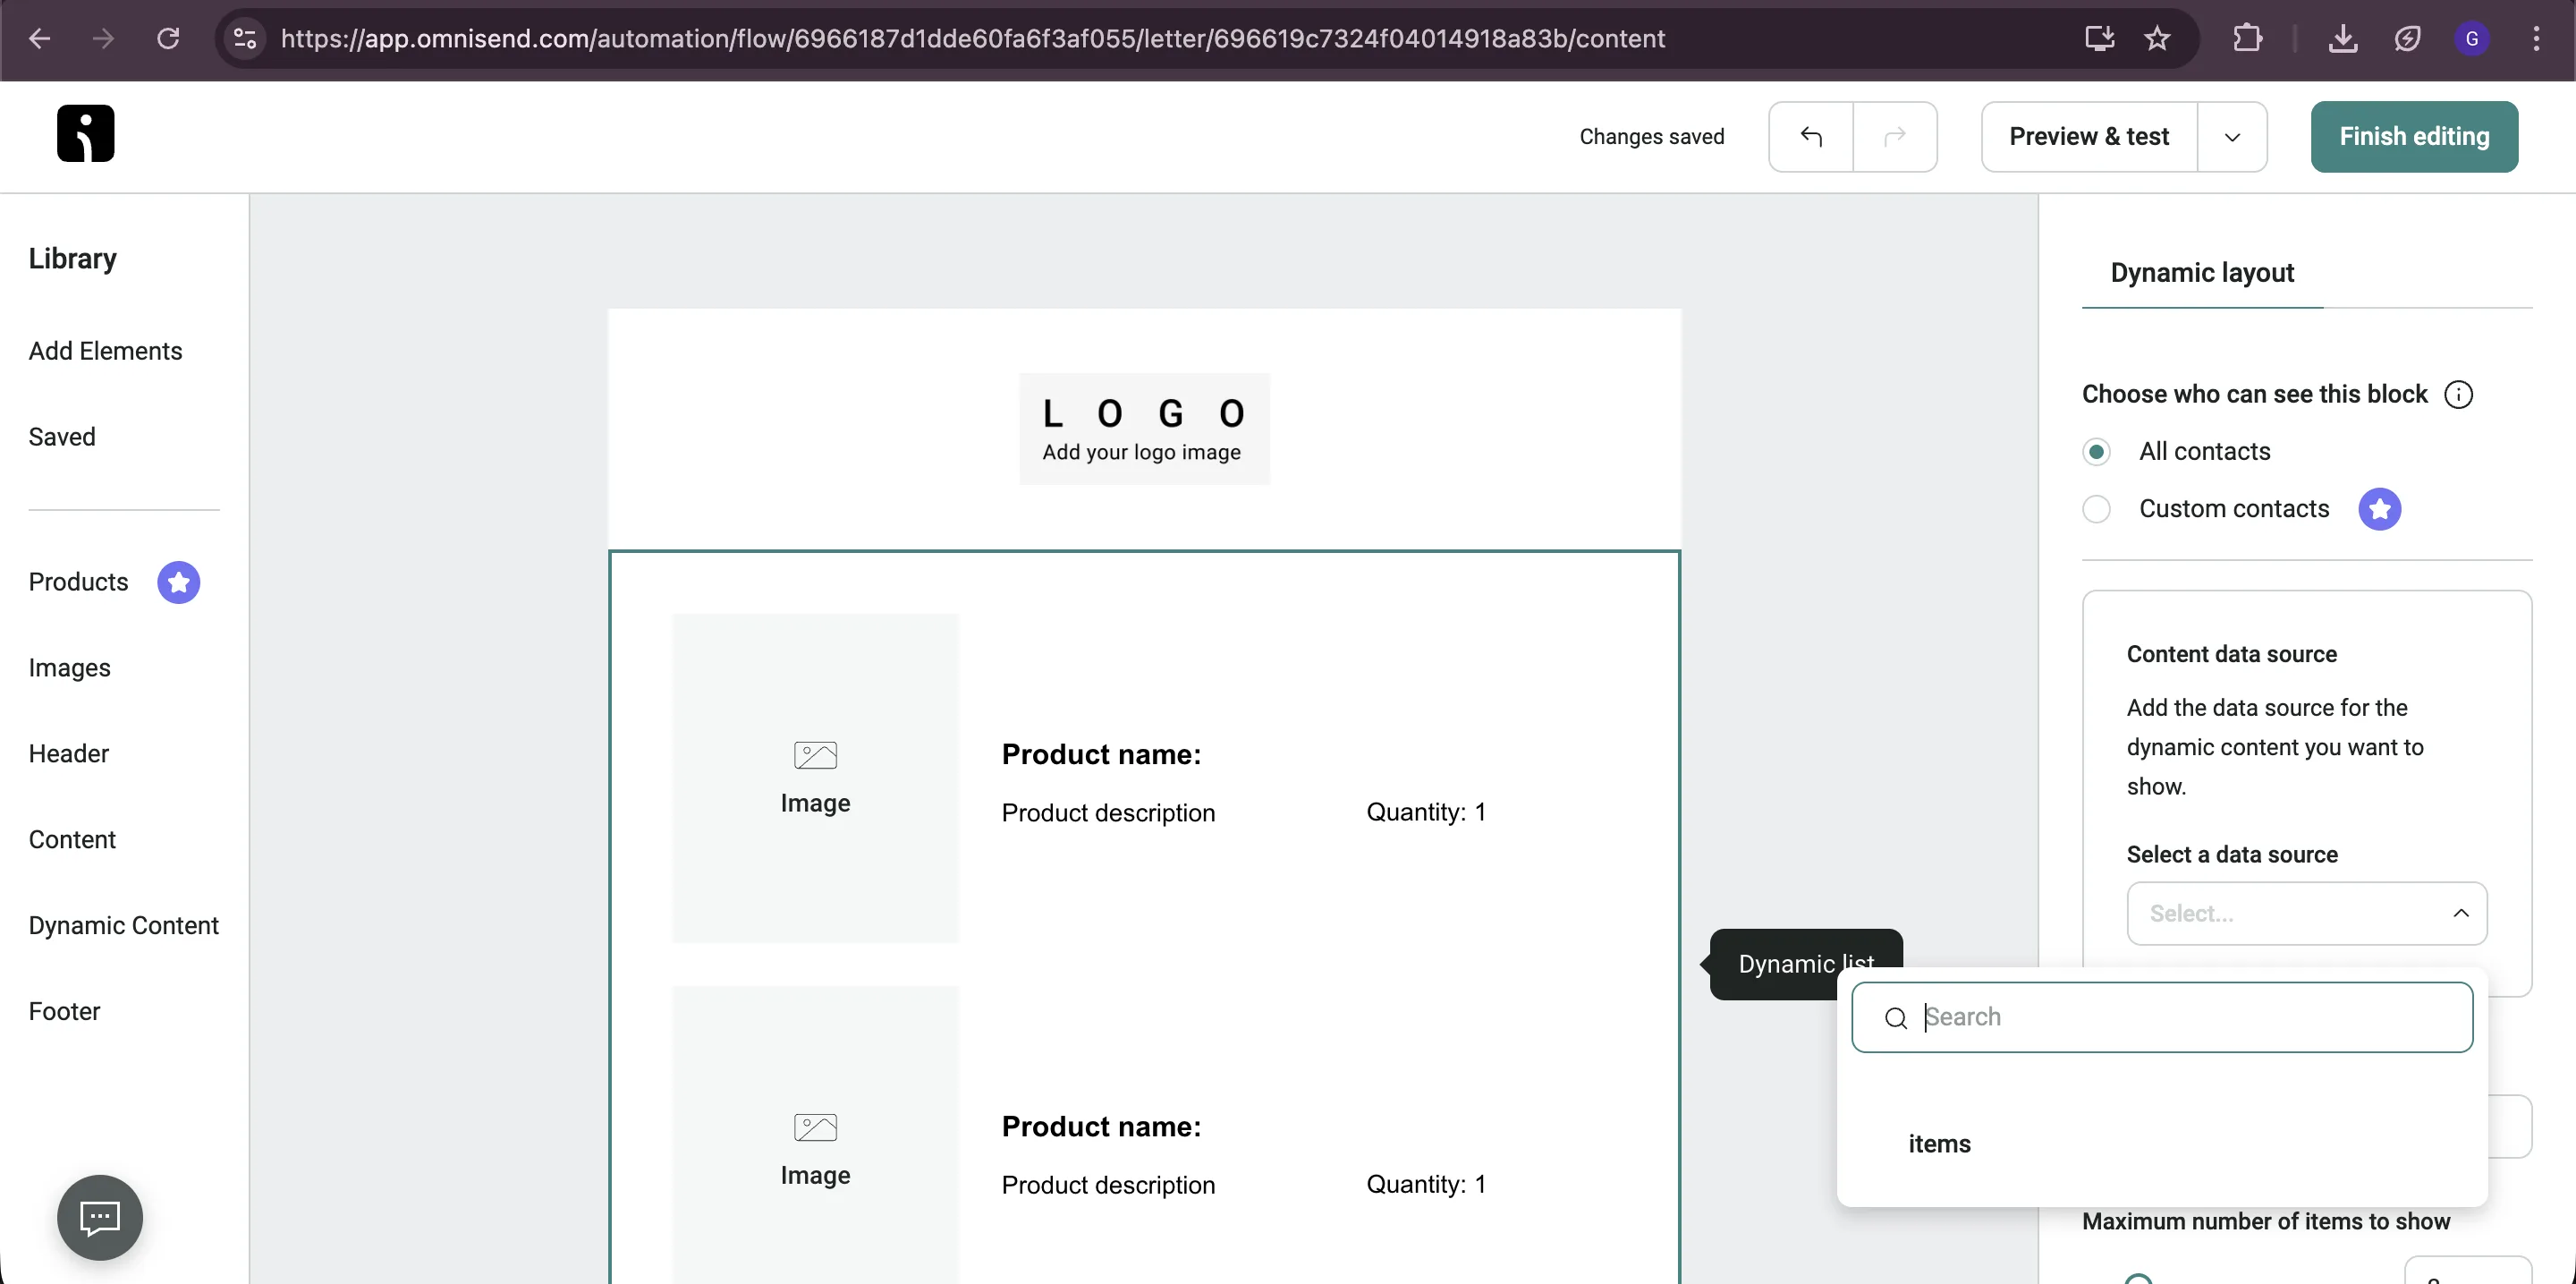
The items variable contains the order items. Use these dynamic variables in your email:
| Variable | Description |
|---|---|
[[ item.title ]] | Product title |
[[ item.quantity ]] | Quantity ordered |
[[ item.price ]] | Product price |
[[ item.image ]] | Product image URL |
6: Add Personalization and Conditional Content
Section titled “6: Add Personalization and Conditional Content”Omnisend uses special syntax for dynamic content. Here are key variables you can use:
Personalization Variables:
| Variable | Description |
|---|---|
[[ event.customer_name ]] | Customer’s name |
[[ event.discount_text ]] | Discount text |
Conditional Syntax Example:
[% if event.customer_name %]  Hi [[ event.customer_name ]]![% endif %]
[% if event.discount_text %]  [[ event.discount_text ]][% endif %]
This shows content only when the variable has a value.
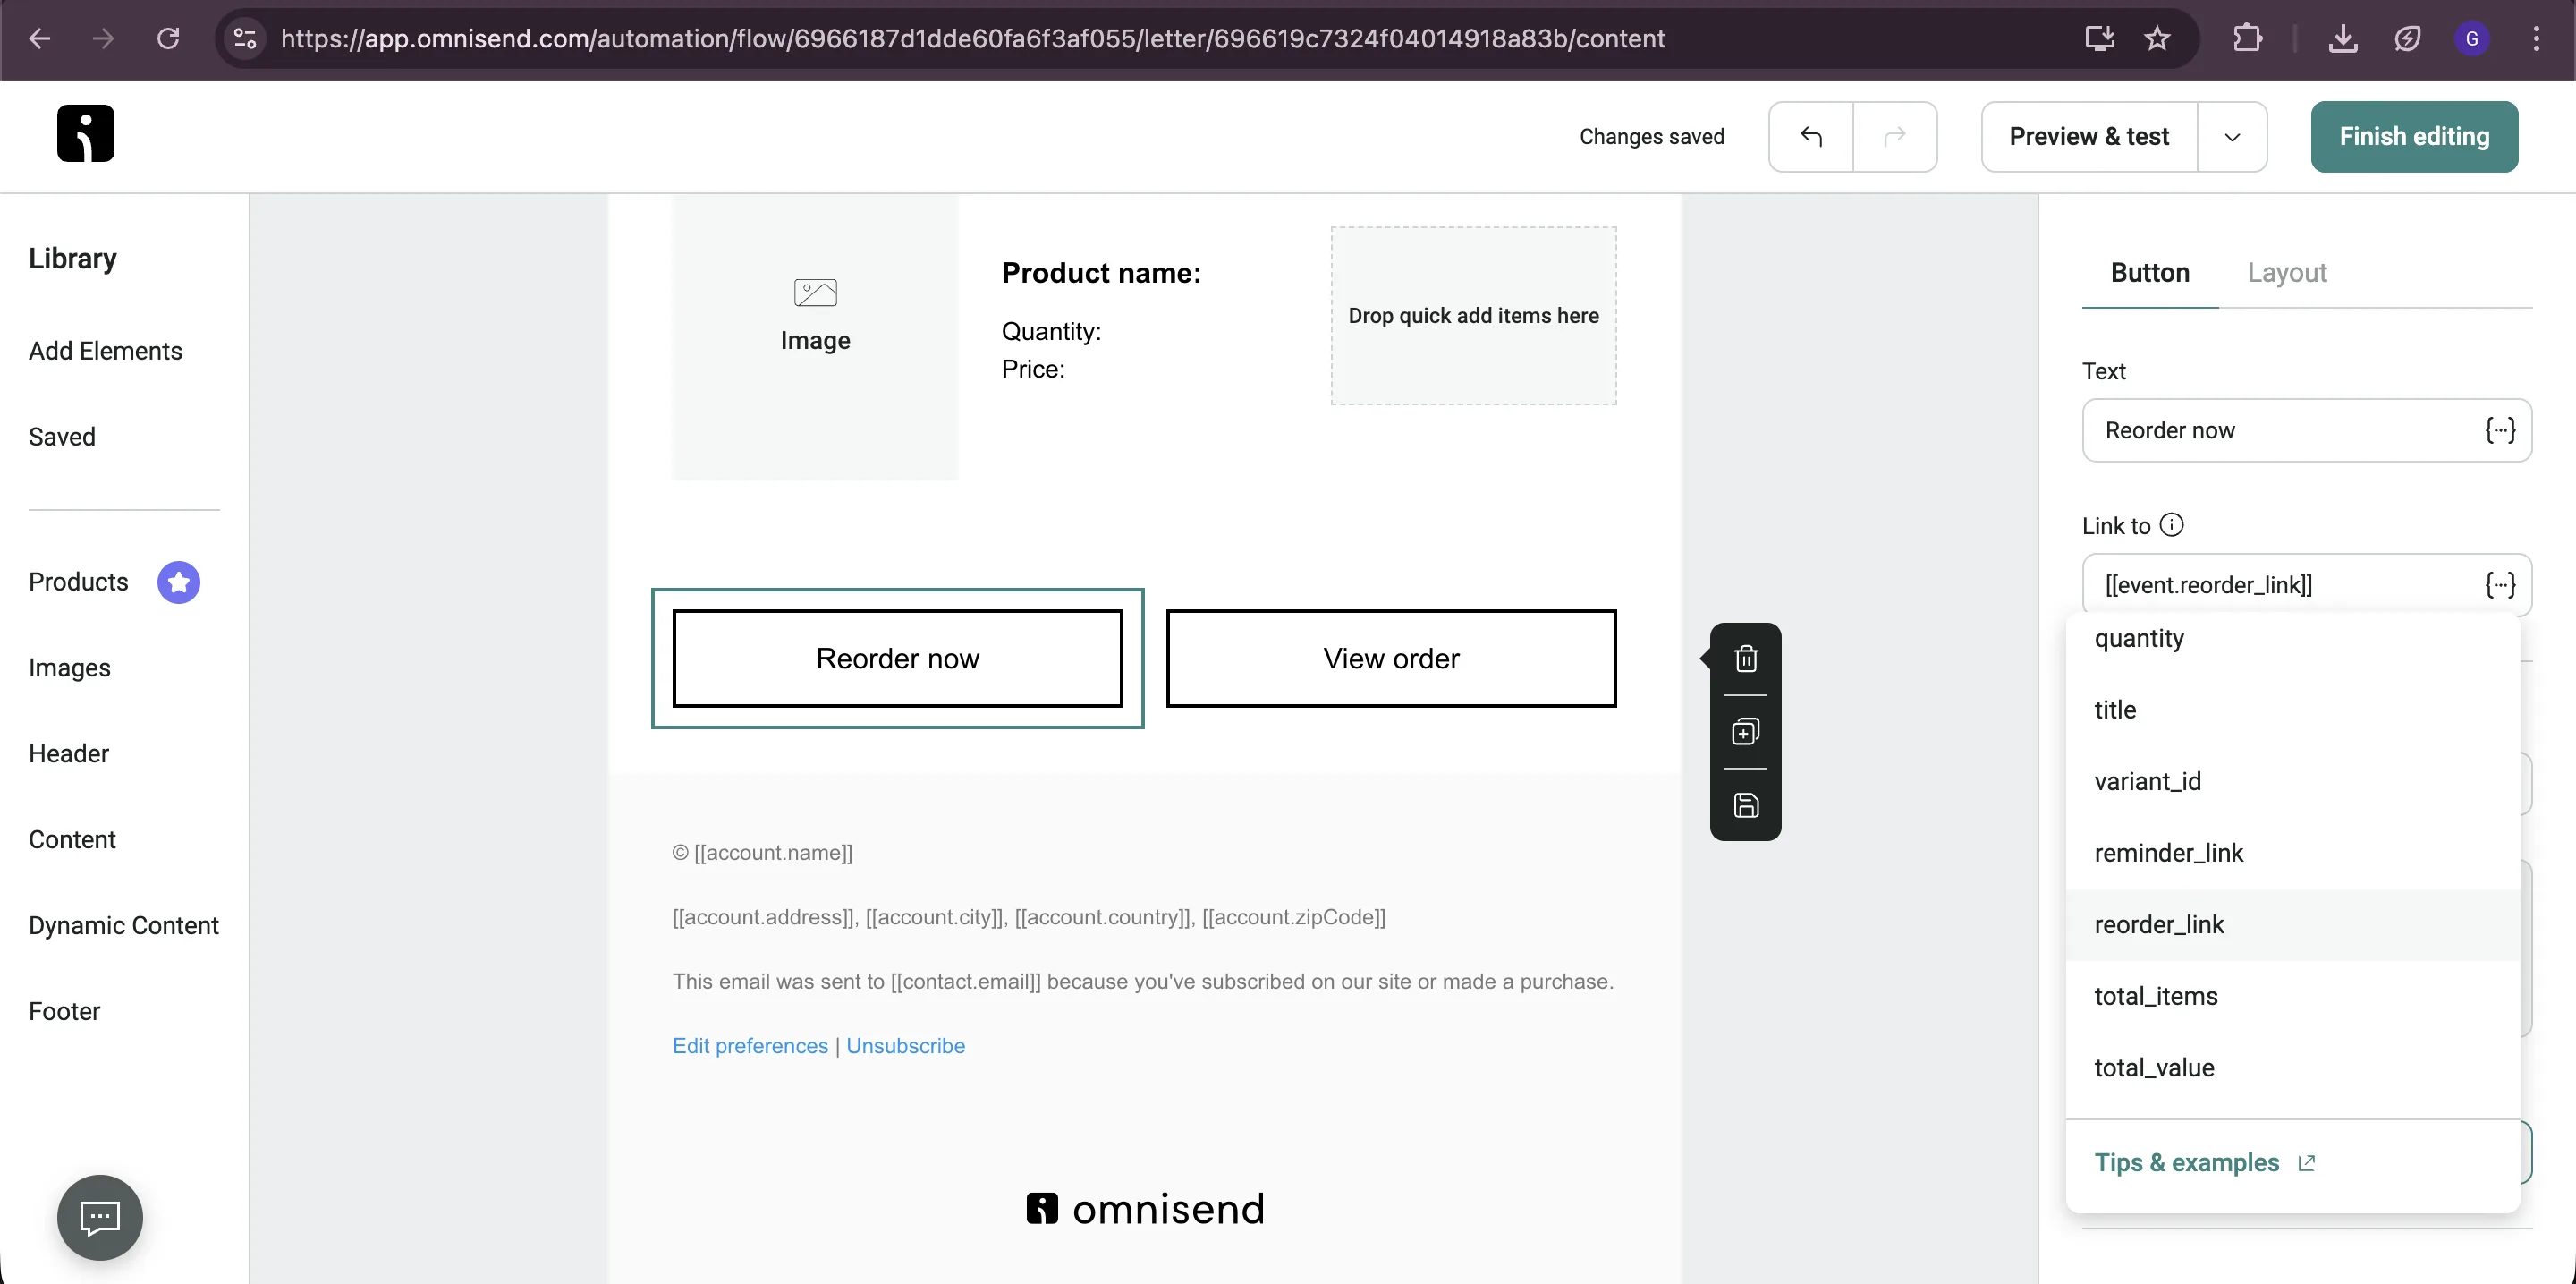
7: Add Action Buttons
Section titled “7: Add Action Buttons”- In the left panel, drag and drop two buttons block. Click on the button to edit text and link.
- First button is for reorder link and second button is to view order details.
8: Activate the Automation
Section titled “8: Activate the Automation”- Click on Finish editing on the top right.
- On the automation screen, edit the name of automation by clicking on edit on top left.
- Click on Start workflow to start the automation.